Find My Device is a built-in security feature in Windows 11 that helps you locate your laptop or desktop if it gets lost or stolen. When enabled, your PC regularly sends its last known location to your Microsoft account. To use this feature, ensure location services are turned on and your PC is signed in with a Microsoft account.
📌 Microsoft Reference: Microsoft Support – Find My Device
🛠️ Steps to Enable Find My Device
- Open Settings: Press Windows + I or click the Start menu → Settings.
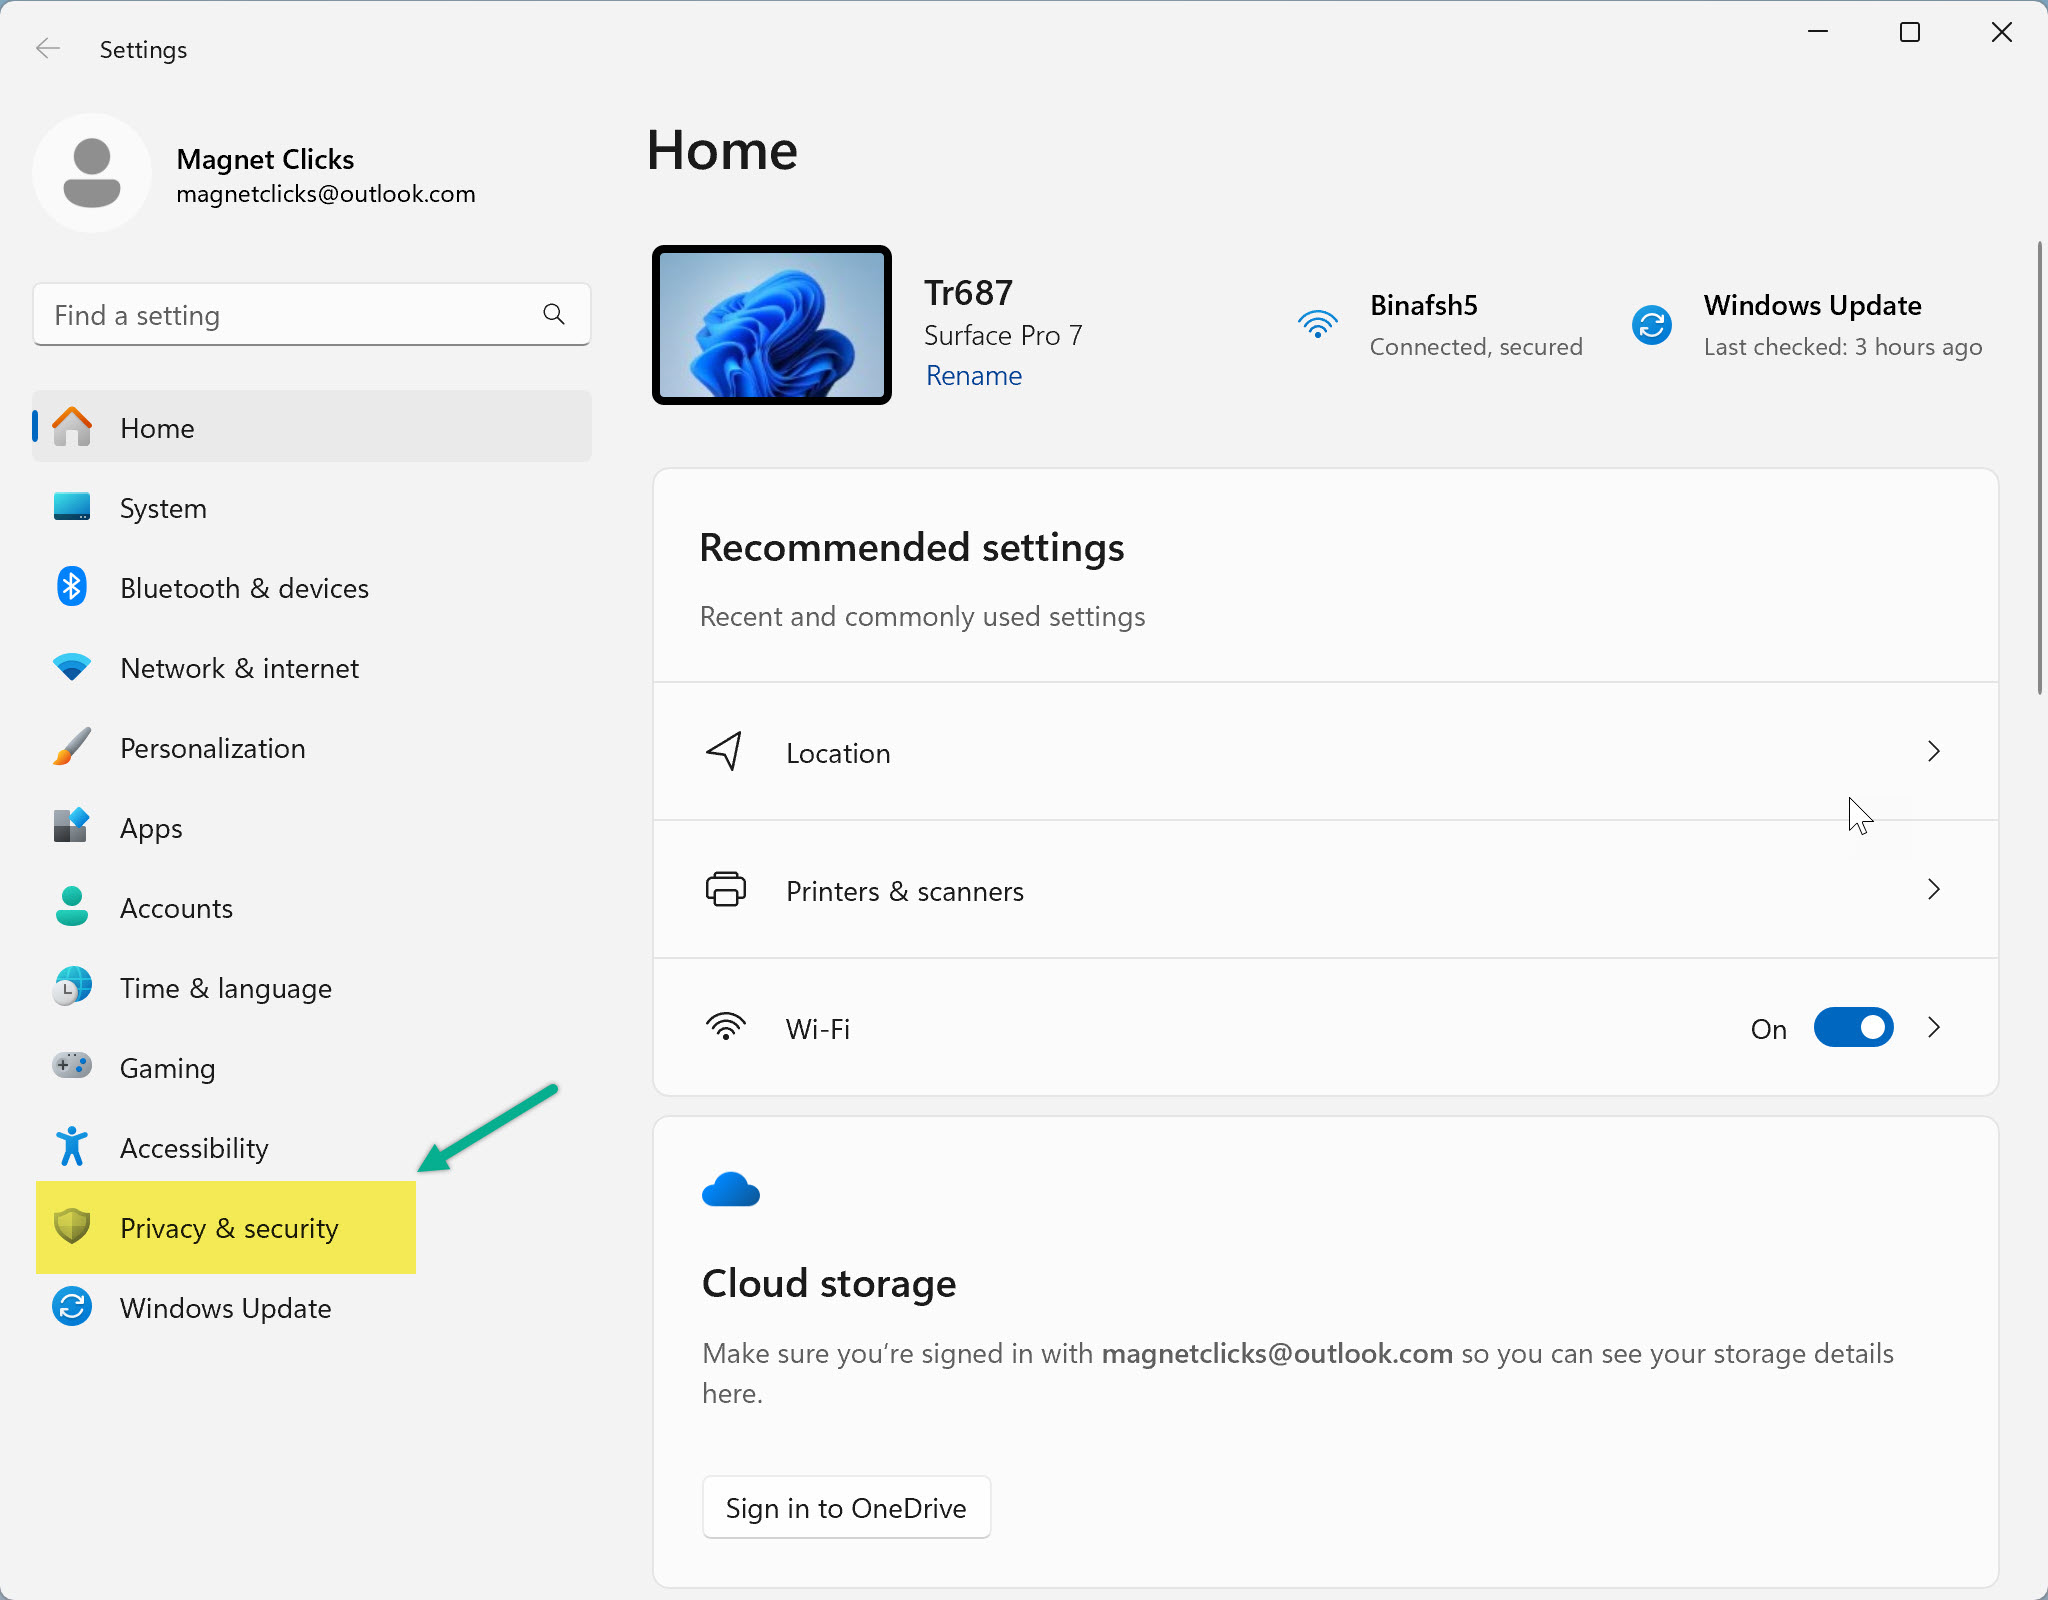
Launch Windows Settings via Start Menu - Go to Privacy & Security: In the sidebar, select Privacy & Security.
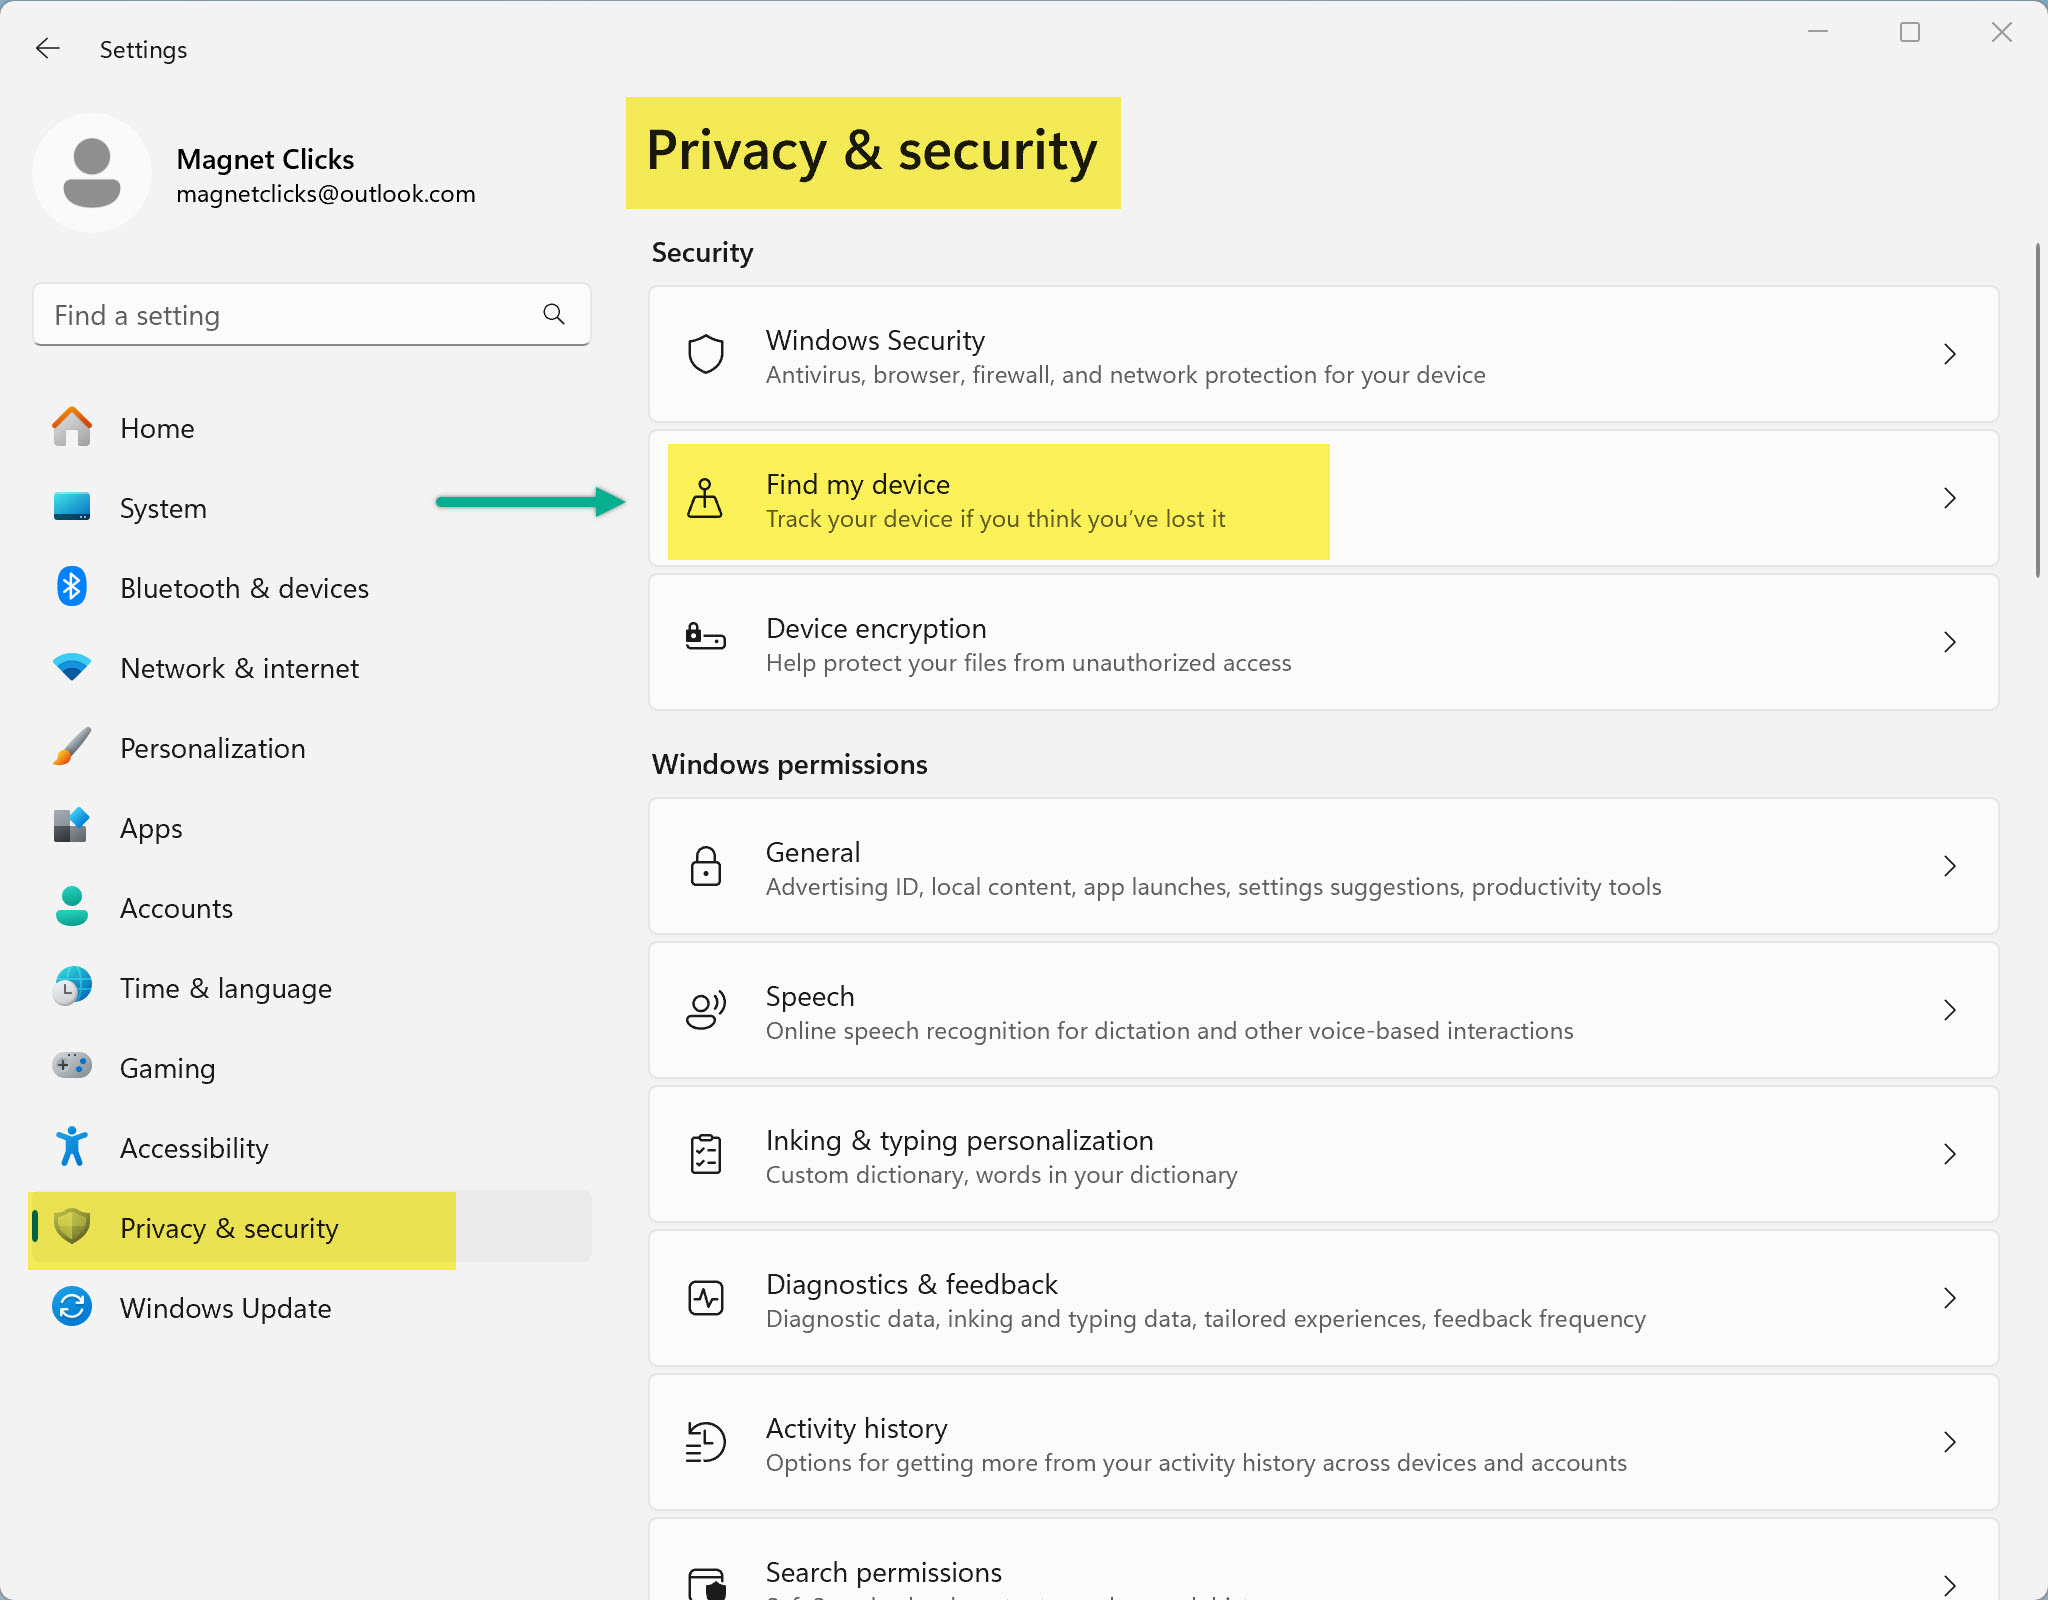
Privacy & Security settings page - Select Find My Device: Scroll to Find My Device and click it.
Access Find My Device settings - Enable the Setting: Toggle the switch to ON.
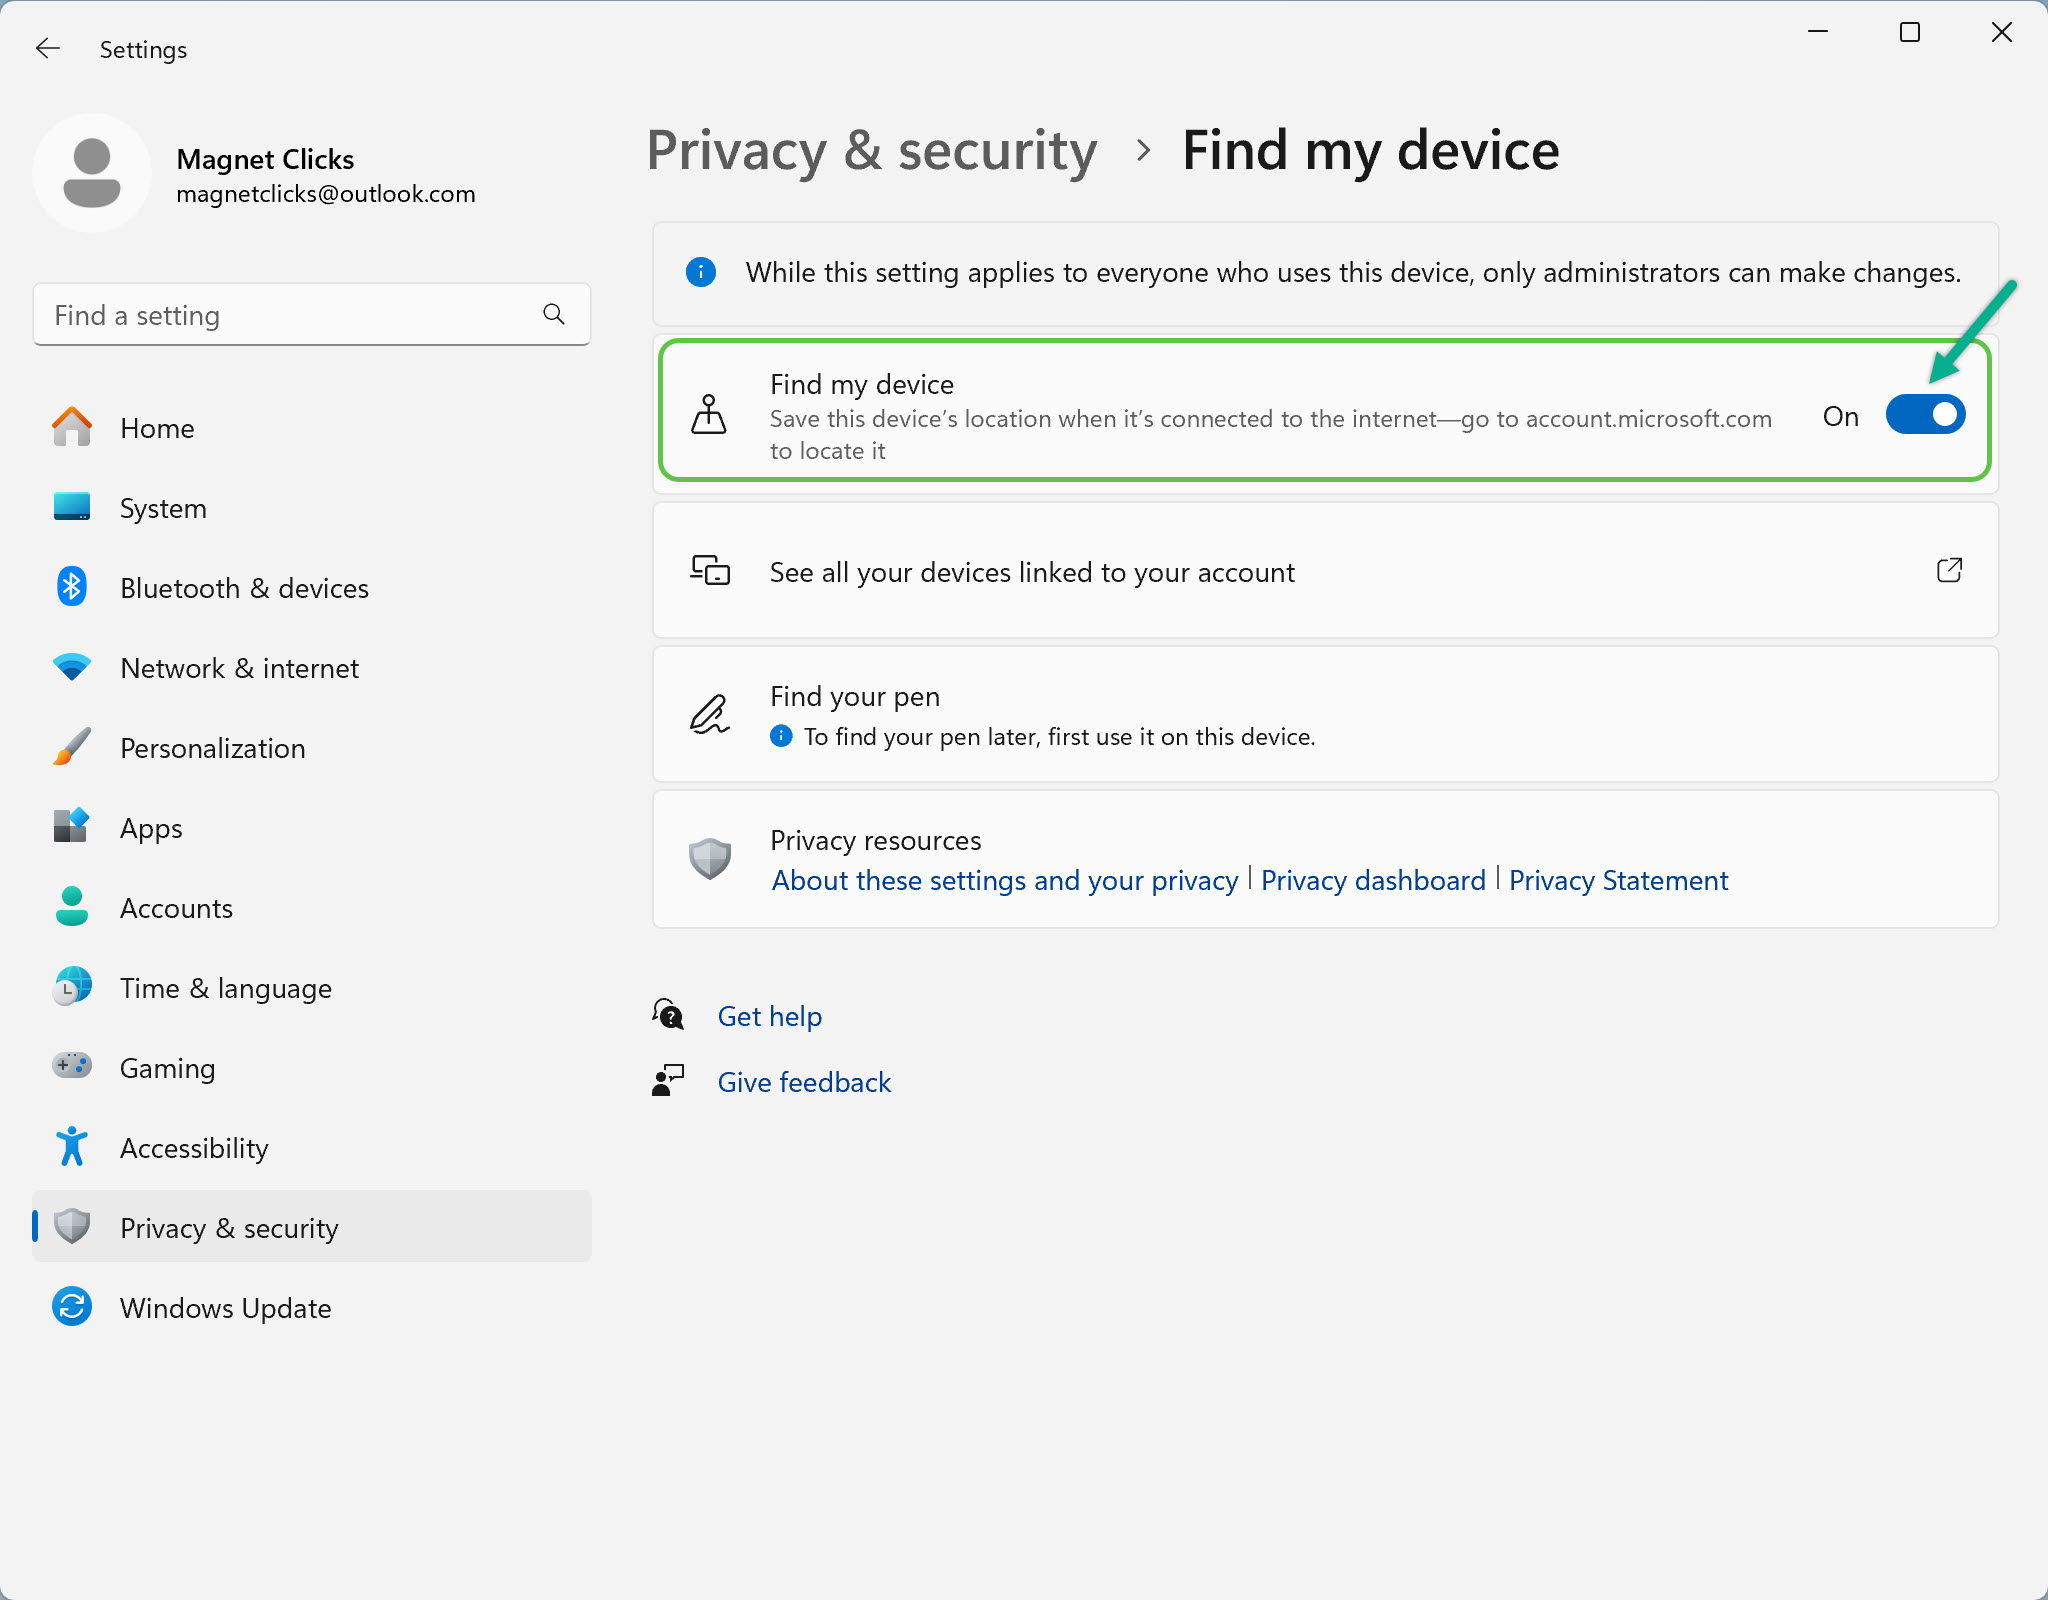
Enable Find My Device toggle - Sign In with a Microsoft Account: If prompted, log in with an administrator-level Microsoft account.
- Ensure Location Services Are Enabled: Find My Device won’t work without location access. Enable Location Services if needed.
💡 Why Enable Find My Device?
- Track your PC’s location if it gets lost or stolen
- Provides peace of mind, especially for travelers or remote workers
- Works seamlessly with your Microsoft account dashboard
📍 Related Articles
- How to Turn On Location Services in Windows
- Tips to Speed Up Your Computer
- Track Devices via Microsoft Account
Frequently Asked Questions
What is Find My Device in Windows 11?
It allows you to remotely track your PC’s last known location using your Microsoft account.
Do I need a Microsoft account to use it?
Yes. The feature only works if your device is signed in with a Microsoft account that has admin rights.
Will it work without location services?
No. Location services must be turned on in Windows Settings.
Can I enable this on a work or school laptop?
Only if your system administrator allows it and the device isn’t restricted by group policy.
How do I track my device if lost?
Log into your Microsoft Devices page to see its last known location.