

Microsoft Word is one of the most widely used tools for writing and formatting documents—whether you’re creating a school assignment, a business report, a resume, meeting notes, or a formal letter. The challenge for beginners is that Word can feel “simple” at first, but small mistakes (like using Enter to add spacing or manually formatting headings) often cause big formatting problems later.
This tutorial teaches Microsoft Word the way most people wish they learned it from day one: step-by-step, with real examples, Windows vs macOS notes, and the exact features that help you create clean, professional documents that don’t break when you edit them.
Overview
You’ll learn the essential Word workflow: create a document, format it correctly, use styles (the “secret” to professional formatting), add structure like headings and page numbers, insert tables and images, collaborate with comments, and export to PDF.
What You Will Learn
- How to create, save, and organize Word documents
- How to format text and paragraphs without causing layout issues
- How to use Styles (Headings) for consistent formatting
- How to add headers, footers, and page numbers correctly
- How to insert and format tables and images
- How to collaborate using comments and Track Changes
- How to export or save your Word file as a PDF
- Common mistakes and fixes beginners face
Prerequisites
- Microsoft Word (Microsoft 365 desktop app recommended). The steps are similar for Word 2021/2019.
- Windows 10/11 or macOS
- Basic file management knowledge (saving and finding files)
Step-by-Step Instructions
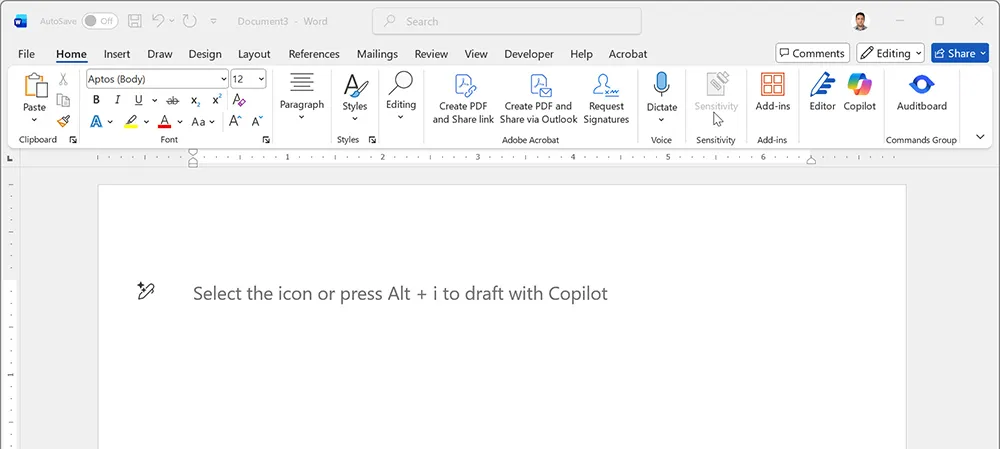
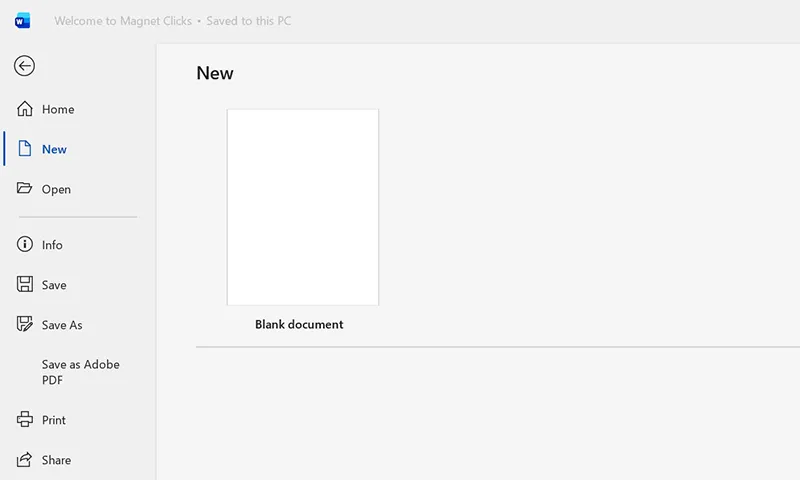
Step 1: Create a New Document
Open Microsoft Word and choose one of these options:
- Blank document (best for learning and custom formatting)
- Template (useful for resumes, letters, reports, and invoices)
Windows: Open Word > Home > New > Blank document
macOS: Open Word > File > New from Template (or Blank Document)
Google Docs note: Go to docs.google.com and select Blank or choose a template from the Template Gallery. The concept is identical even though the interface differs.
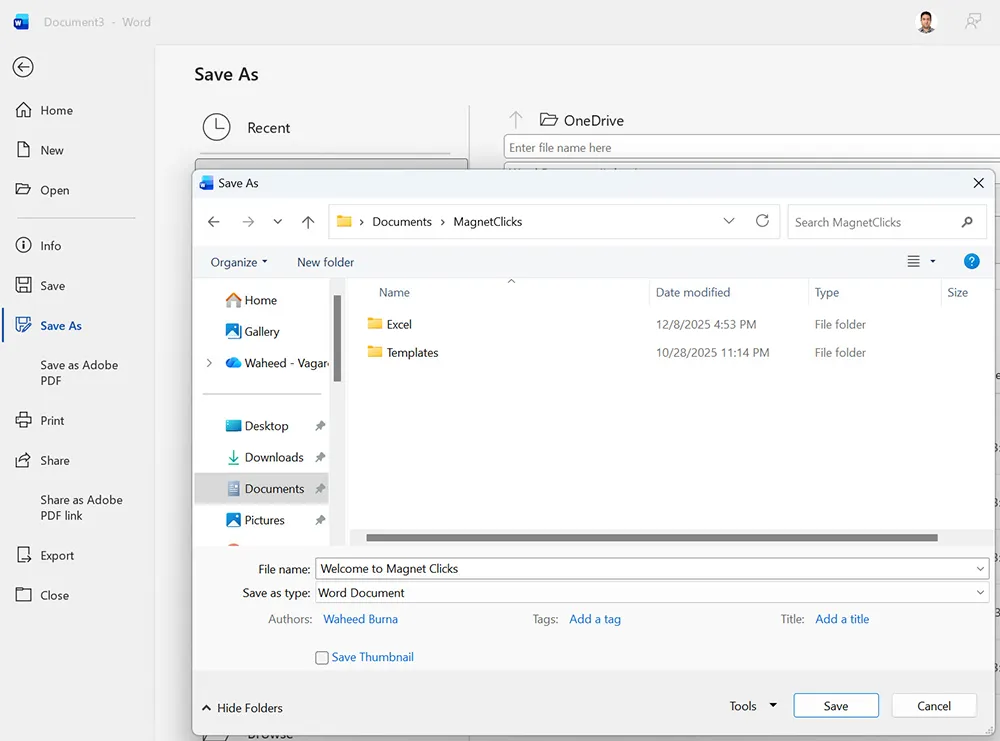
Step 2: Save Your Document the Right Way
Saving early prevents lost work and keeps your document organized.
- Use File > Save As and choose a folder you can find again (Documents, Desktop, or a project folder).
- Name your file clearly: ProjectName_Report_v1.docx
- If you collaborate, consider saving to OneDrive so autosave and version history can help.
Google Docs note: Files save automatically to Google Drive. Use File > Rename and File > Move to organize documents into folders.
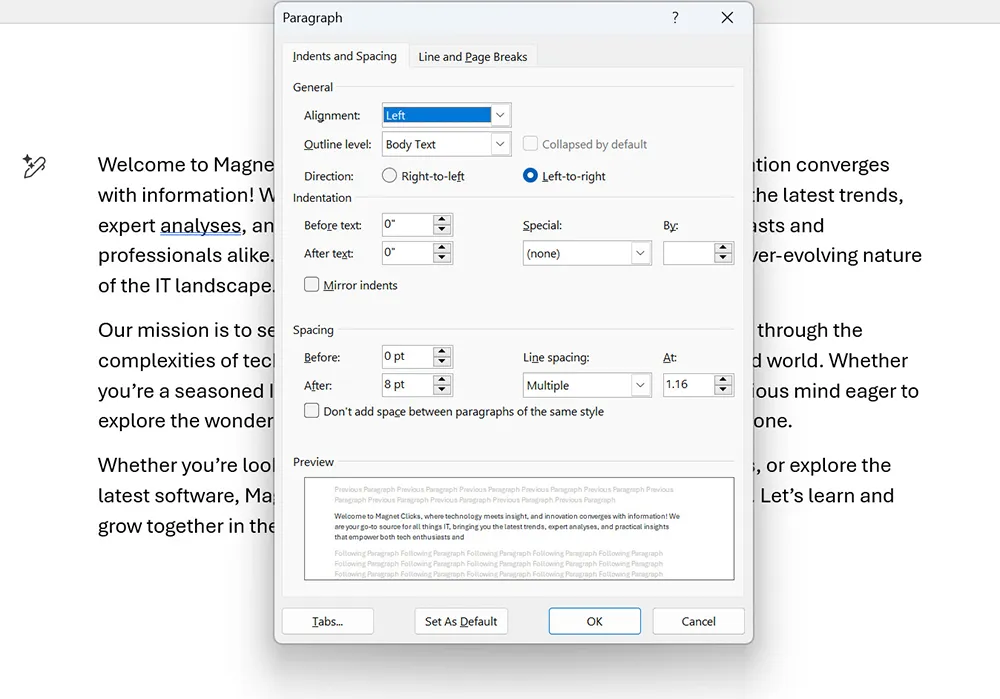
Step 3: Learn the Word “Golden Rule” for Formatting
Most Word formatting problems come from one beginner habit: using Enter multiple times to create spacing. Instead, use:
- Paragraph spacing (Before/After)
- Line spacing (1.0, 1.15, 1.5, 2.0)
- Styles for headings and body text
This approach keeps documents stable when you edit content later.
Google Docs note: Use Format > Line & paragraph spacing. The rule is exactly the same.
Step 4: Format Text and Paragraphs (Clean + Professional)
Go to the Home tab and focus on these areas:
- Font: typeface, size, bold/italic/underline
- Paragraph: alignment, indentation, bullets/numbering
- Spacing: line spacing and paragraph spacing
If you work with spreadsheets and want your Word documents to look consistent with your Excel reports, you’ll often combine Word formatting with structured tables and summary figures. For example, if you build totals in Excel using SUM or conditional totals with SUMIF, you can paste results into Word and format them cleanly using consistent styles.
Google Docs note: Formatting options are found in the top toolbar and the Format menu. The behavior is the same even though labels differ.
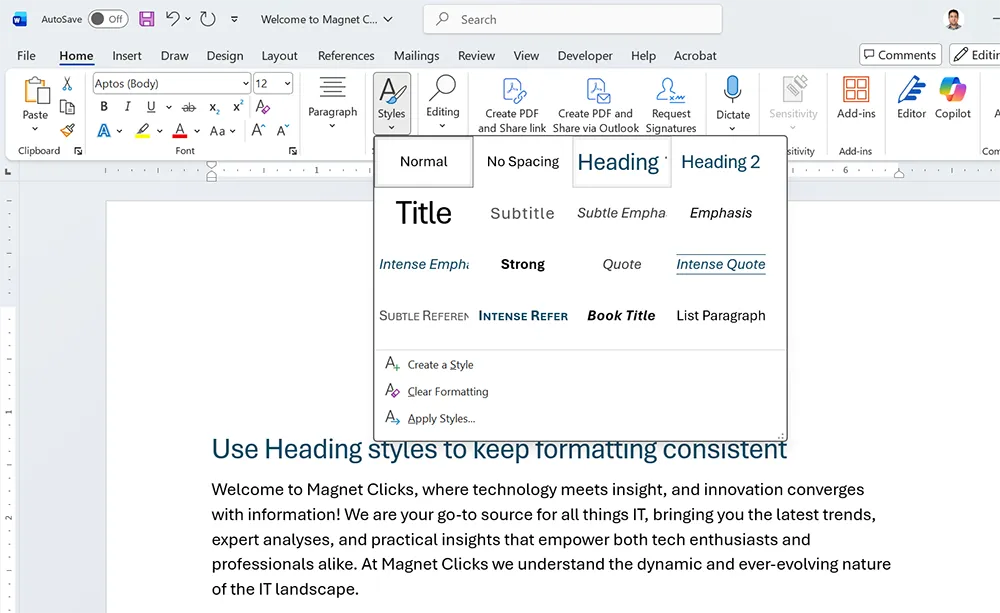
Step 5: Use Styles (This Is the Most Important Word Skill)
Styles are pre-built formatting rules that make your document consistent and easy to update. The biggest benefit is that styles enable structured navigation and an automatic Table of Contents later.
Do this:
- Select a heading (like “Introduction”).
- Home tab > Styles > choose Heading 1.
- Use Heading 2 for subsections.
- Use Normal style for body text.
Pro tip: If you don’t like how a style looks, modify the style once and Word updates all matching text.
Google Docs note: Use the “Normal text” dropdown in the toolbar to apply headings. These headings also power navigation and tables of contents.
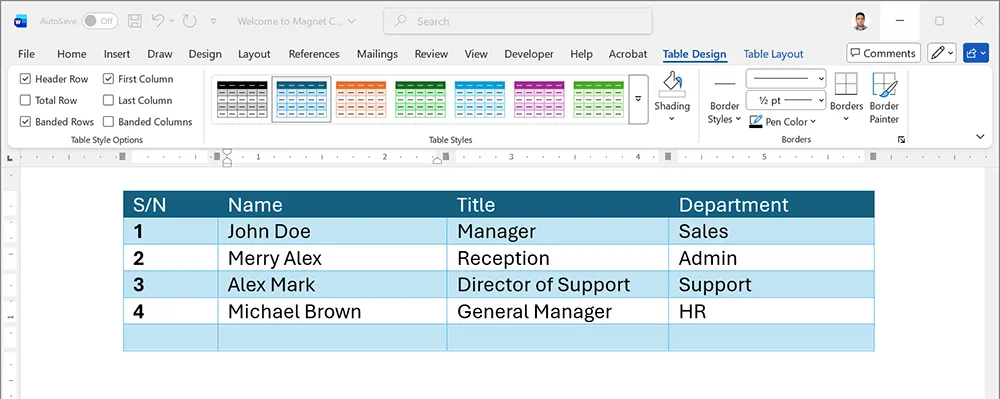
Step 6: Insert a Table (For Structured Information)
Tables are ideal for schedules, comparisons, checklists, and structured data.
- Go to Insert > Table.
- Choose the number of rows/columns or select Insert Table.
- Use Table Design for styles and borders.
Google Docs note: Insert > Table. Formatting options appear in the toolbar and right-click menu.
If you already manage structured lists in Excel (like dropdown lists for data validation), consider using Word tables for documentation and Excel for data entry. If you haven’t built dropdown lists in Excel yet, this tutorial is a strong companion: How to Create Dropdown Lists in Excel.
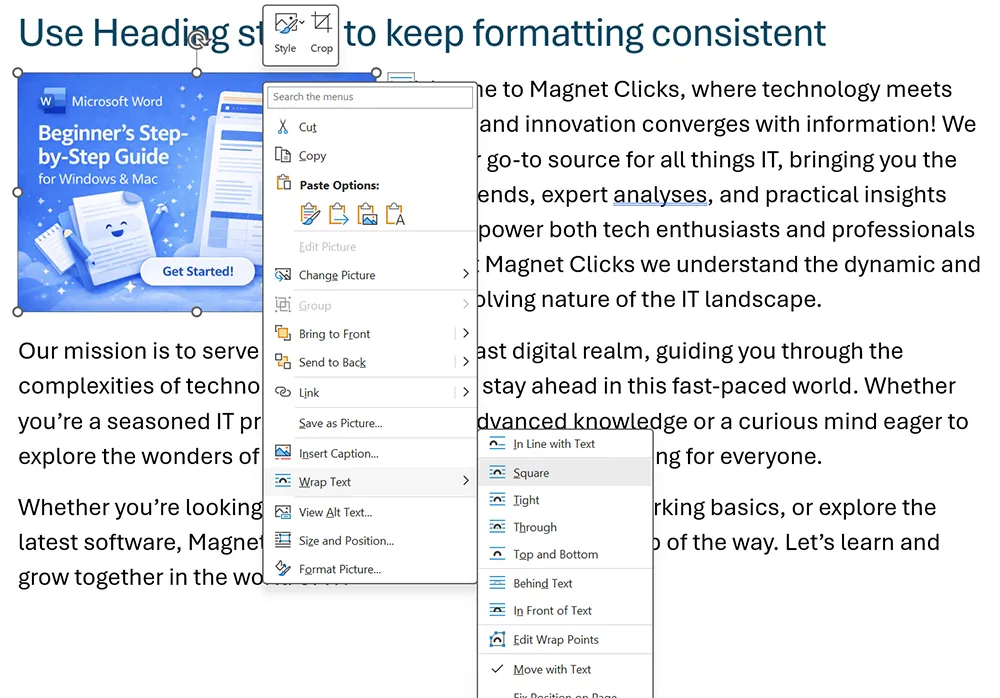
Step 7: Insert Images and Control Layout
Images often “jump” around in Word because of wrapping settings. The safe approach for beginners is:
- Start with In Line with Text (stable layout)
- Use Square or Tight when you need text to wrap
- Use Fix position on page only if you understand anchors
Steps:
- Insert > Pictures
- Select the image
- Click the Layout Options icon (or right-click) to choose wrapping
Google Docs note: Image wrapping options appear when the image is selected. Use “In line” for stable layouts.
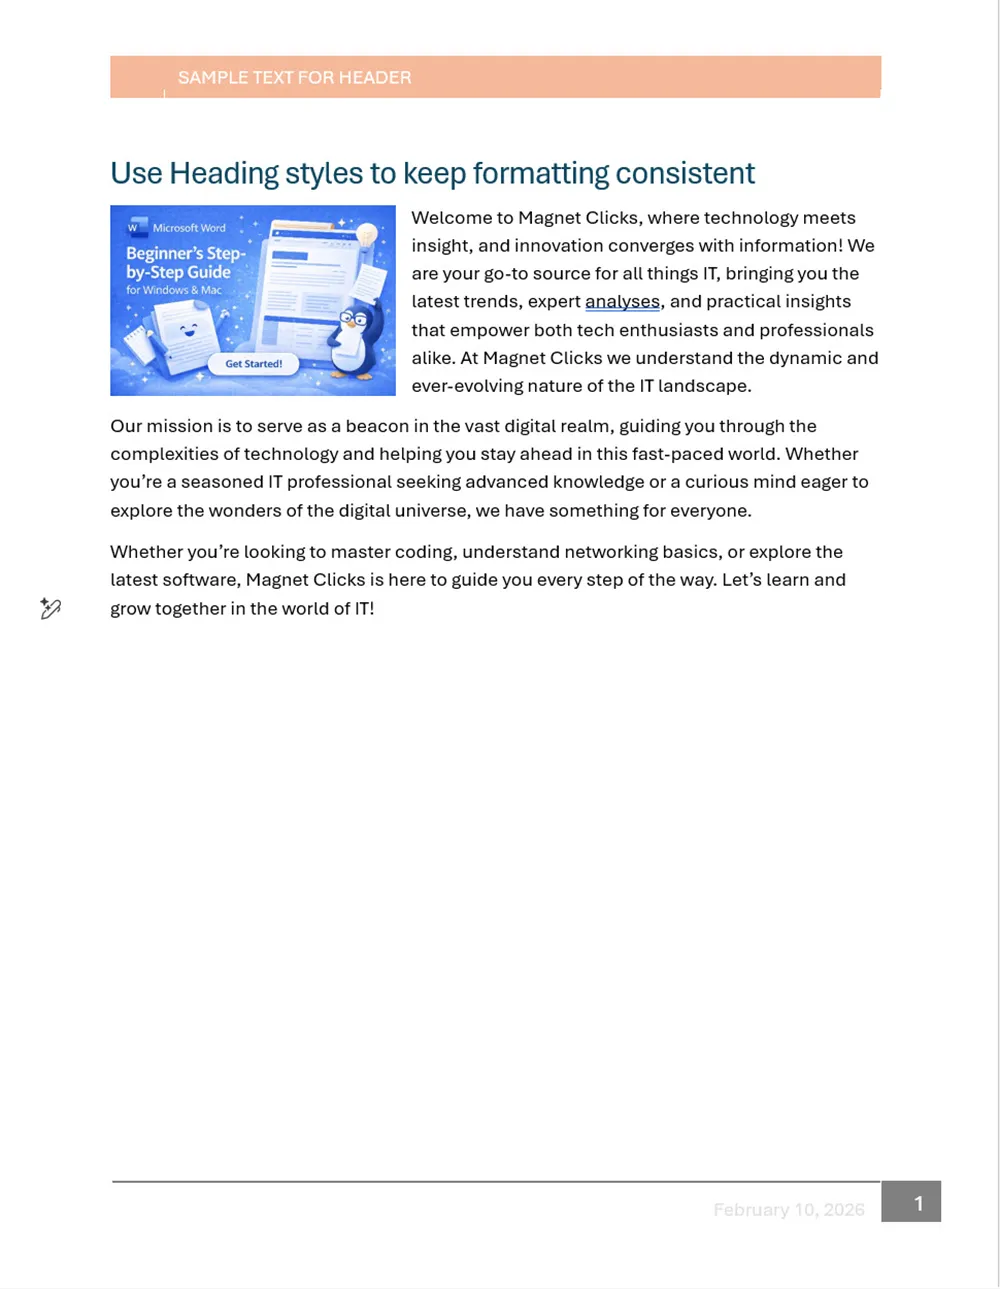
Step 8: Add Headers, Footers, and Page Numbers
This is essential for reports, policies, school assignments, and multi-page documents.
- Insert > Header (or Footer)
- Choose a simple style
- Insert > Page Number
- Pick top/bottom placement
Google Docs note: Insert > Headers & footers. Section-based numbering exists but is simpler than Word.
If your page numbers don’t behave (for example, you want Roman numerals for the introduction and normal numbers for the body), you’ll need section breaks. Don’t worry—we cover the “what breaks what” logic in the Mistakes & Fixes section below.
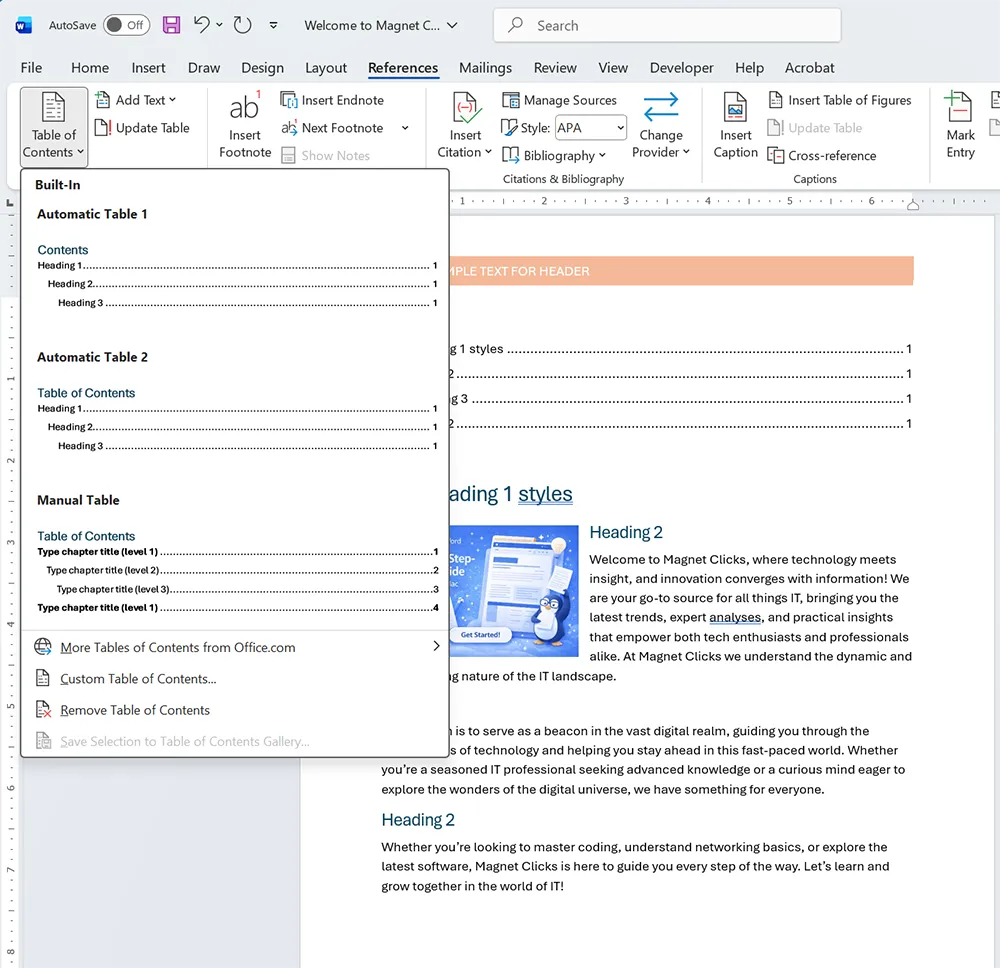
Step 9: Create a Table of Contents (Optional, But Powerful)
A Table of Contents works properly only if you used Heading styles.
- Place your cursor where the TOC should appear
- References > Table of Contents
- Choose an Automatic TOC option
- Update later: right-click TOC > Update Field
Google Docs note: Insert > Table of contents (links or page numbers).
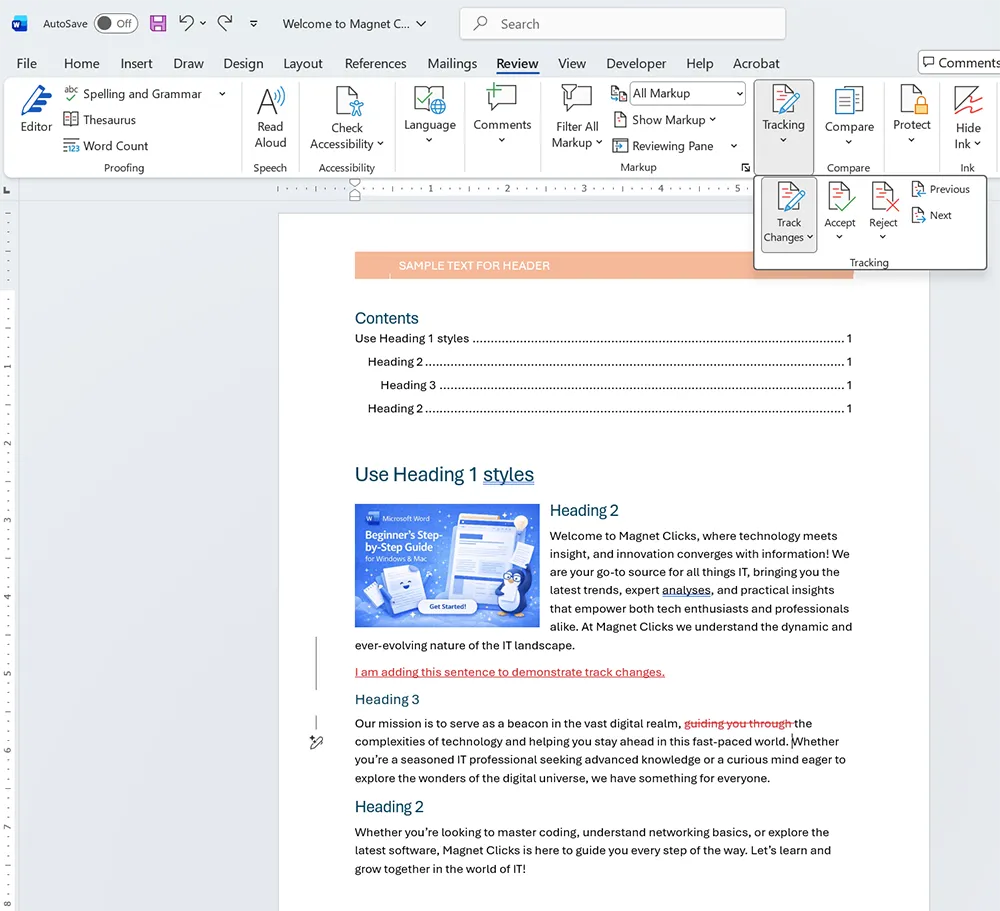
Step 10: Collaborate (Comments + Track Changes)
For team documents, Word’s Review tools are critical:
- Comments: leave notes without changing text
- Track Changes: record edits so others can accept/reject
Steps:
- Go to Review
- Turn on Track Changes
- Use New Comment to add feedback
- Use Accept / Reject to finalize edits
If you share documents through email and want smoother collaboration workflows across Microsoft tools, this related guide is useful for mailbox and calendar delegation: Outlook Delegate Access (Inbox & Calendar).
Both platforms support collaborative editing, but terminology differs:
- Microsoft Word: Track Changes
- Google Docs: Suggesting mode
Both allow reviewers to suggest edits, leave comments, and finalize documents after approval.
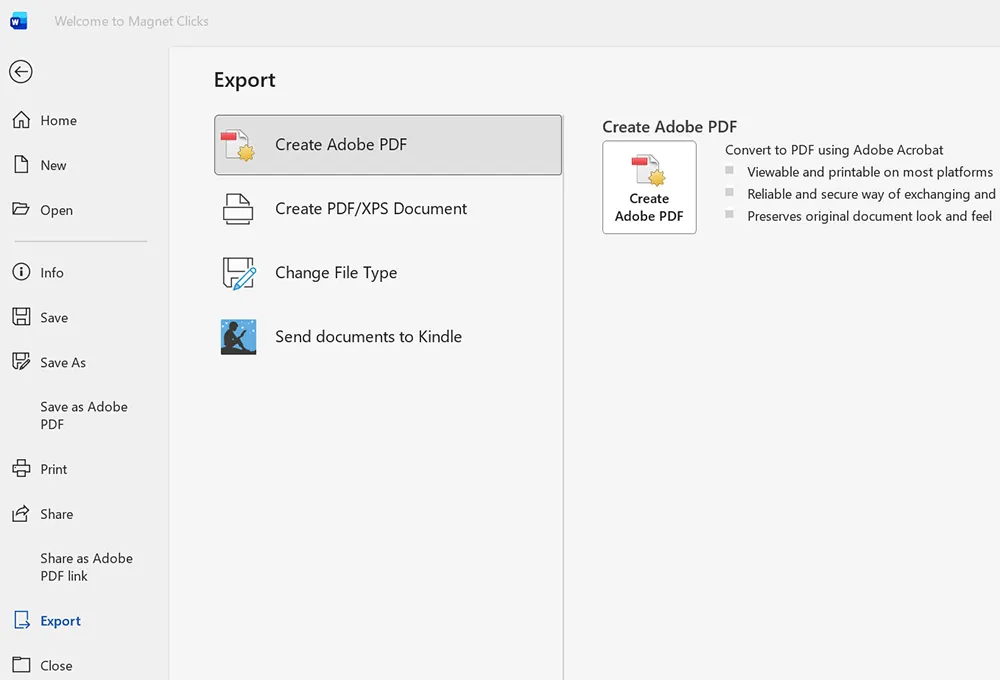
Step 11: Export to PDF (The Correct Way)
To share a document without formatting changing, export to PDF.
- Windows: File > Export > Create PDF/XPS
- macOS: File > Save As > Format: PDF (or File > Export)
Google Docs note: File > Download > PDF Document (.pdf)
If you include tables or values originating from Excel models (forecast outputs, summaries, dashboards), PDF export helps preserve layout. If you also work with forecasting in spreadsheets, see: FORECAST Function in Excel & Google Sheets.
Common Mistakes and Fixes
Mistake 1: Pressing Enter repeatedly to create spacing
Fix: Use paragraph spacing (Home > Paragraph > Spacing Before/After).
Mistake 2: Manually formatting headings instead of using Styles
Fix: Apply Heading 1/2/3 styles so your formatting stays consistent and your TOC works.
Mistake 3: Page numbers restart or headers change unexpectedly
Fix: Check for Section Breaks. When you insert a new section, header/footer settings can “disconnect” or restart numbering depending on options like Link to Previous.
Mistake 4: Images jump around when you type
Fix: Use In Line with Text for stability, then upgrade wrapping to Square/Tight when needed. Avoid “Fix position” until you understand anchors.
Mistake 5: Copy/paste from web or email ruins formatting
Fix: Use Paste Options:
- Keep Text Only (removes messy formatting)
- Merge Formatting (blends into your document style)
Tips and Best Practices
- Start with styles early: It’s easier than fixing later.
- Use Navigation Pane: View > Navigation Pane to jump between headings.
- Keep formatting simple: Consistency looks more professional than heavy styling.
- Use templates for recurring documents: Reports, meeting notes, proposals, SOPs.
- Export to PDF for final sharing: Prevents layout differences across devices.
If you’re building reports that include spreadsheet logic, keep Word for writing and structure while Excel handles calculations and analysis. When you need flexible lookup behavior in spreadsheets (to build cleaner report inputs), see: XLOOKUP Replaces VLOOKUP.
Practical Use Cases
Use Case 1: Create a Professional Business Report
- Use Heading styles for structure
- Add a Table of Contents
- Insert tables for summary metrics
- Export to PDF for distribution
Use Case 2: Write Meeting Notes That Don’t Get Messy
- Use a simple template layout (date, attendees, agenda, action items)
- Use tables for action items
- Use consistent headings per meeting
Use Case 3: Insert Excel Summaries into Word
Build totals and summaries in Excel, then paste into Word as tables or formatted text. If you summarize large data with pivot reports before writing, see: Pivot Tables in Excel. If you filter source data first, see: FILTER Function in Excel & Google Sheets.
Use Case 4: Create a Client-Ready Document Package
- Cover page (optional)
- Headers/footers with company name
- Page numbers
- Appendix tables or screenshots
- Final export to PDF
Microsoft Word becomes easy and predictable once you follow the correct foundation: save early, format with paragraph settings, structure with styles, and use Word’s built-in tools for headers, page numbers, and exporting. If you master just one “power skill” as a beginner, make it Styles—because styles prevent formatting disasters and unlock professional features like automatic tables of contents.