

Microsoft Word is not just a writing tool—it can also be used to create structured, interactive fillable forms for business, HR onboarding, client intake, IT requests, and internal approvals. When built correctly, a Word form allows users to enter information into predefined fields while preventing them from breaking your layout.
In this complete step-by-step guide, you’ll learn how to create professional fillable forms in Microsoft Word using content controls, dropdown lists, checkboxes, date pickers, and document protection settings. This guide works for both Windows and macOS versions of Microsoft Word.
What Is a Fillable Form in Microsoft Word?
A fillable form in Word is a structured document that contains interactive fields—called Content Controls—where users can type or select information. Unlike a standard document, a protected form restricts editing so users can only enter data inside designated fields.
Typical use cases include:
- Employee onboarding forms
- IT service request forms
- Client intake forms
- Event registration forms
- Purchase approval forms
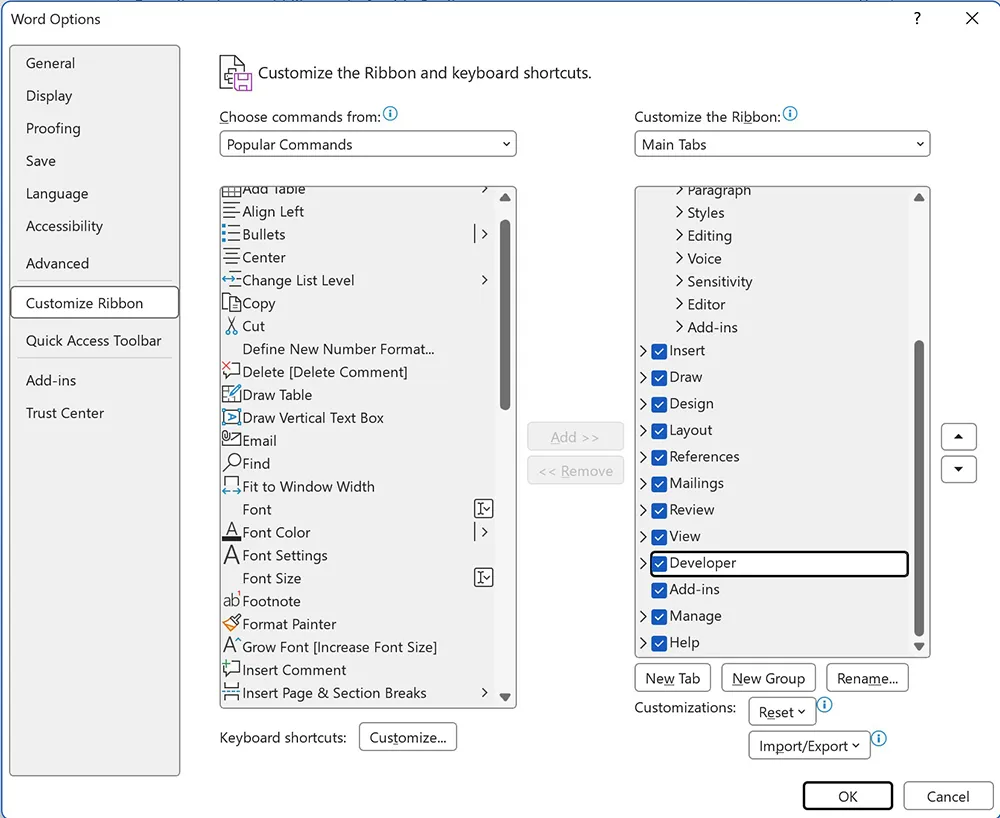
Before You Start: Enable the Developer Tab
The Developer tab contains the tools required to build interactive form fields.
Windows
- Click File
- Select Options
- Click Customize Ribbon
- Check the box next to Developer
- Click OK
macOS
- Click Word in the top menu
- Select Preferences
- Click Ribbon & Toolbar
- Enable Developer
Understanding Content Controls (The Core of Word Forms)
Content controls are interactive fields inserted into a document. They allow structured input while preserving document formatting.
Common controls include:
- Plain Text Control
- Rich Text Control
- Check Box Control
- Drop-Down List Control
- Combo Box
- Date Picker
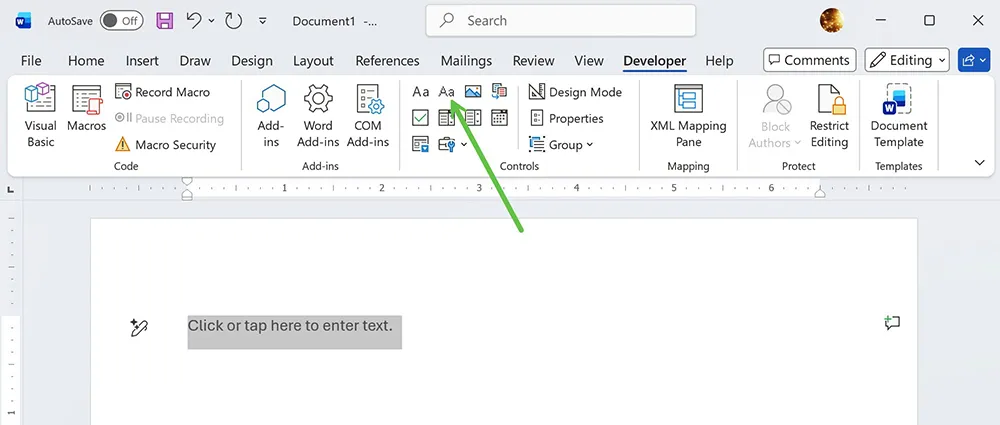
Step 1: Insert Plain Text Fields
Plain Text Content Controls are ideal for short responses such as name, email, phone number, or employee ID.
- Place your cursor where the field should appear.
- Go to the Developer tab.
- Click Plain Text Content Control.
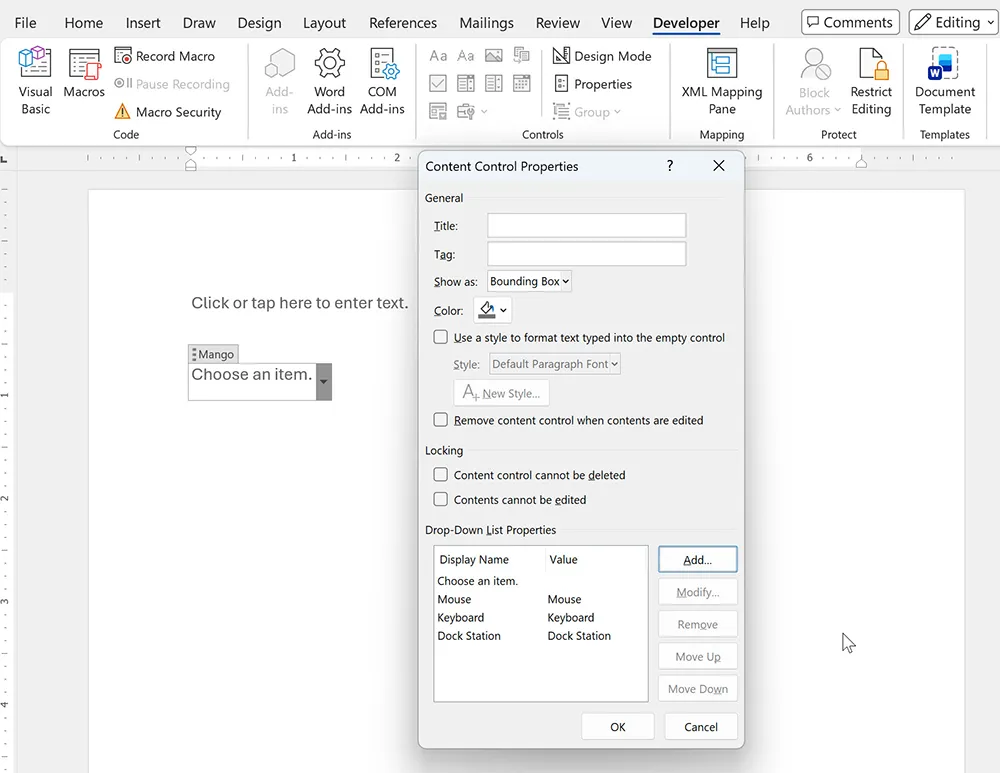
Step 2: Create Dropdown Lists
Dropdown lists prevent users from entering inconsistent data and are perfect for departments, status types, or request categories.
- Insert a Drop-Down List Content Control.
- Select the control.
- Click Properties in the Developer tab.
- Click Add to insert list options.
- Repeat for all values.
If you are familiar with structured dropdown logic from spreadsheets, see our tutorial on
How to Create Dropdown Lists in Excel.
Step 3: Insert Checkboxes
Checkbox controls allow users to select one or multiple predefined options.
- Place cursor under a selection label.
- Click Check Box Content Control.
- Repeat for additional options.
Step 4: Insert Date Picker Fields
Date picker controls standardize date formatting and eliminate manual date entry errors.
- Insert Date Picker Content Control.
- Open Properties.
- Choose preferred date format.
Step 5: Align Form Fields Using Tables
Professional forms should use tables for alignment rather than manual spacing.
If you’re unfamiliar with structured formatting fundamentals, review our complete guide on
How to Use Microsoft Word.
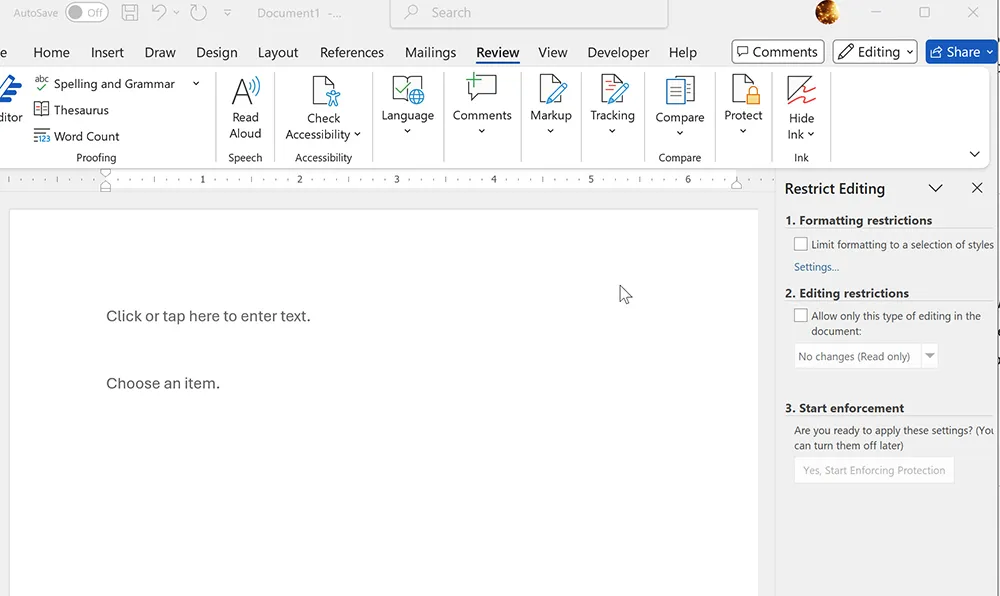
Step 6: Lock the Form (Restrict Editing)
This step prevents users from editing layout or deleting labels.
- Go to Review.
- Click Restrict Editing.
- Check Allow only this type of editing.
- Select Filling in forms.
- Click Start Enforcement.
- Set a password (optional but recommended).
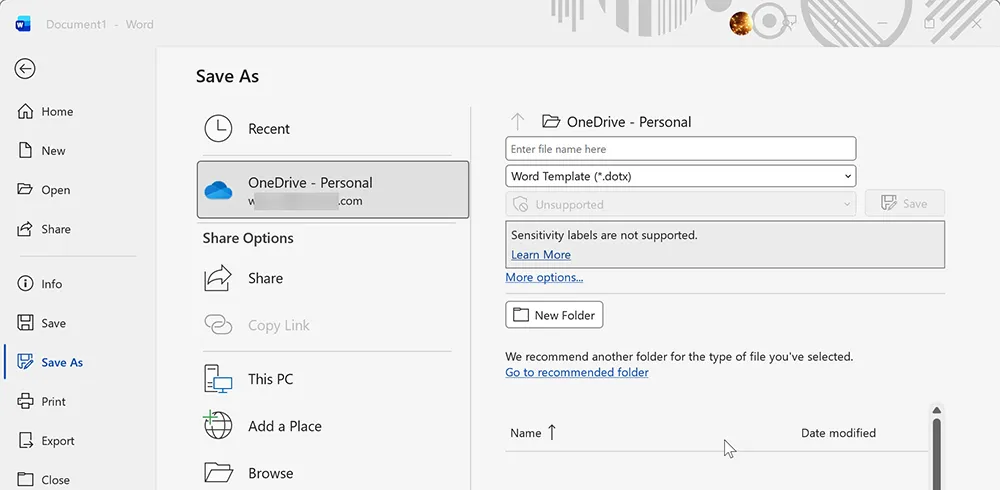
Step 7: Save as a Reusable Template (.dotx)
To reuse your form:
- Click File → Save As.
- Select Word Template (.dotx).
- Save to Templates folder.
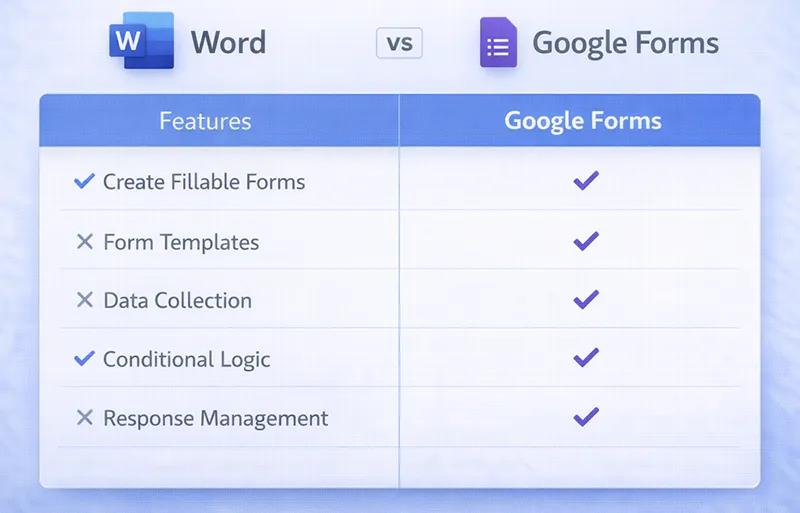
Word Forms vs Google Forms vs Google Docs
| Feature | Microsoft Word | Google Docs | Google Forms |
|---|---|---|---|
| Layout Control | High | Medium | Low |
| Offline Use | Yes | Limited | No |
| Automated Data Collection | No | No | Yes |
| Branding Control | Strong | Moderate | Limited |
Common Problems and Fixes
Developer Tab Missing
Enable it through Options or Preferences.
Fields Not Clickable
You likely enabled protection incorrectly. Remove and reapply restrict editing.
Layout Breaks When Editing
Use tables for structure instead of spacing with Enter.
PDF Not Interactive
Word exports static PDFs. For advanced PDF forms, use Adobe Acrobat.