How to Check Uptime on Windows
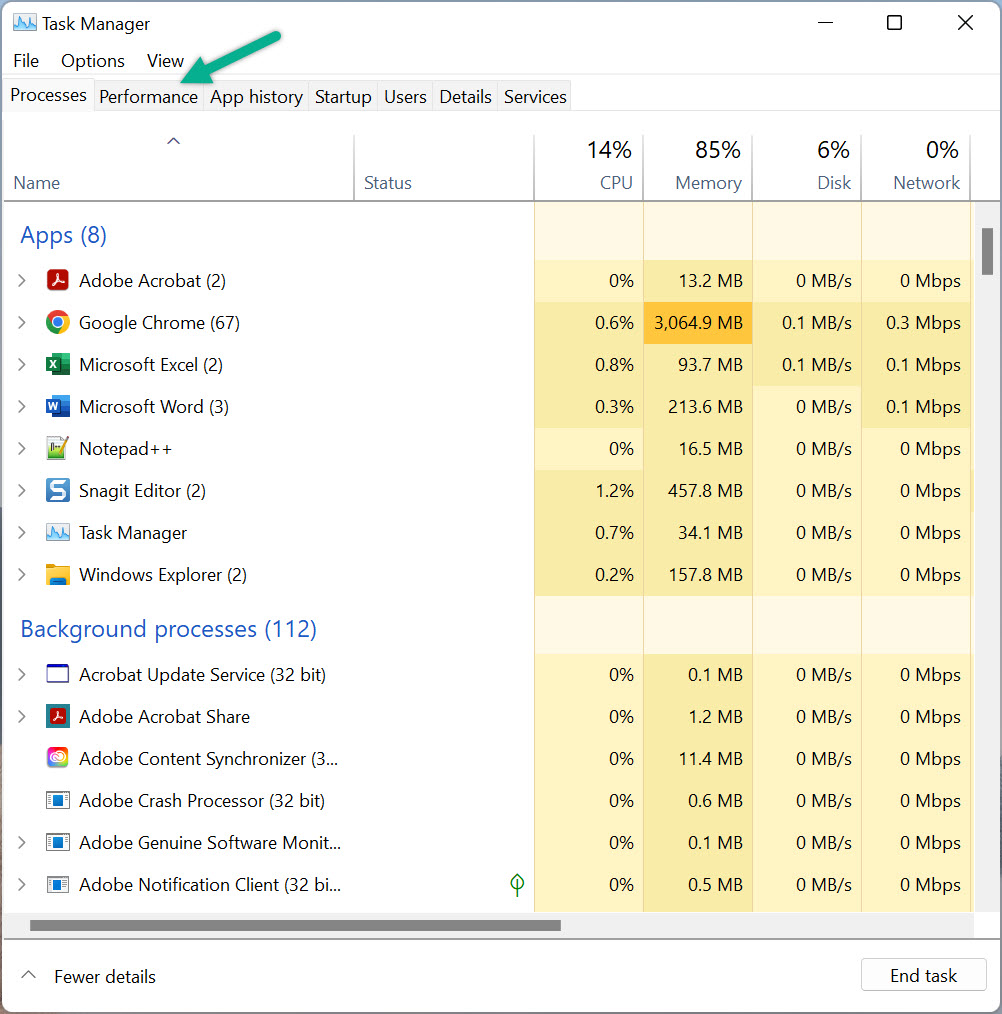
Step 1: Open Task Manager
- Press Ctrl + Shift + Esc to launch Task Manager directly
- Or press the Windows key, type Task Manager, and select it
Alternative Method
Right-click the taskbar and choose Task Manager from the context menu.

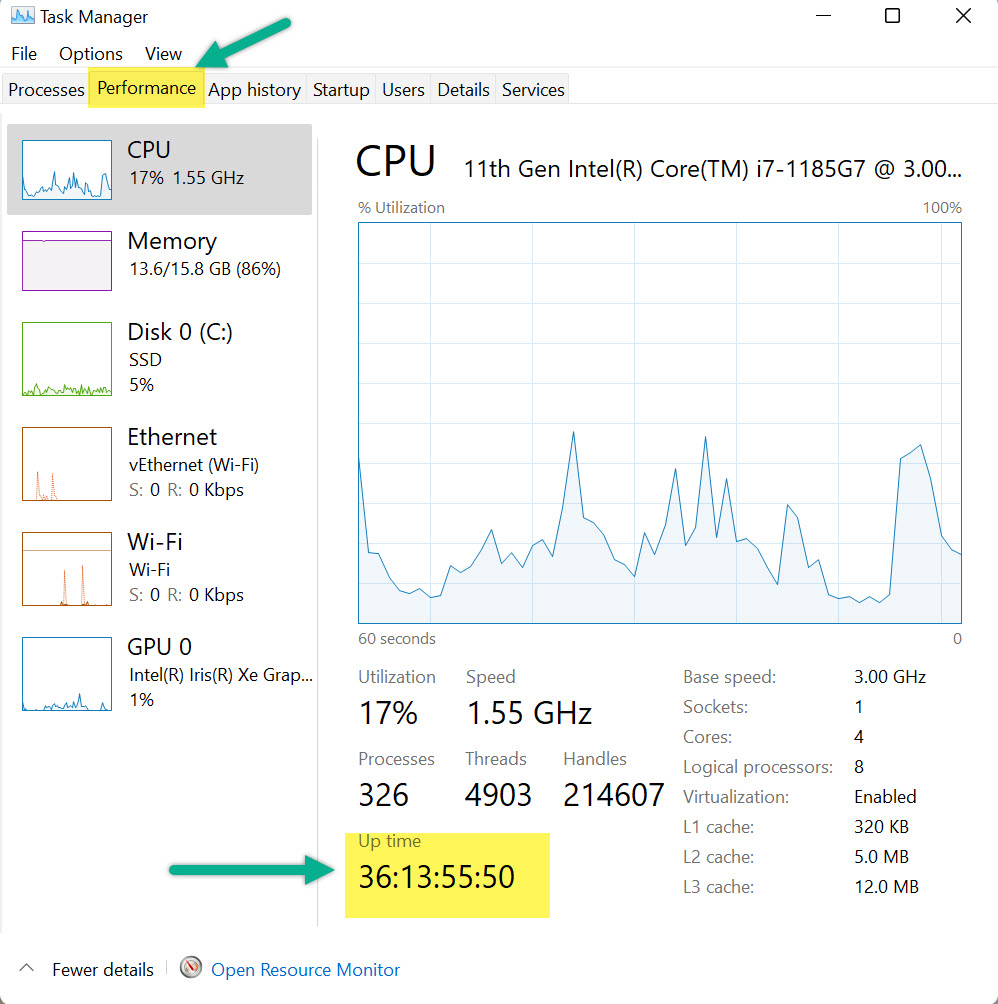
Step 2: Locate the Uptime Info
- Click the Performance tab
- Select CPU from the left panel
- Find the Up time value near the bottom
How to Check Uptime on macOS
Step 1: Open System Information
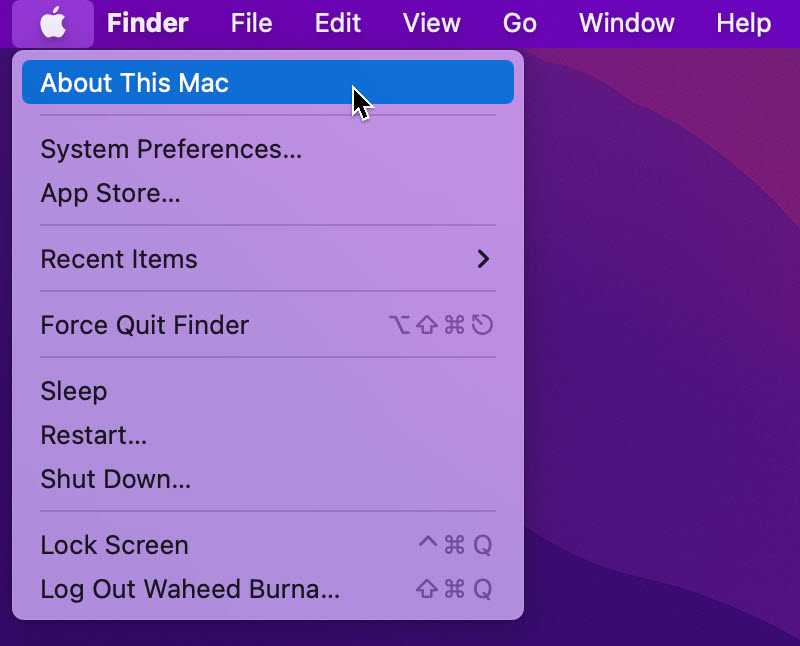
- Click the Apple logo in the top-left corner
- Select About This Mac
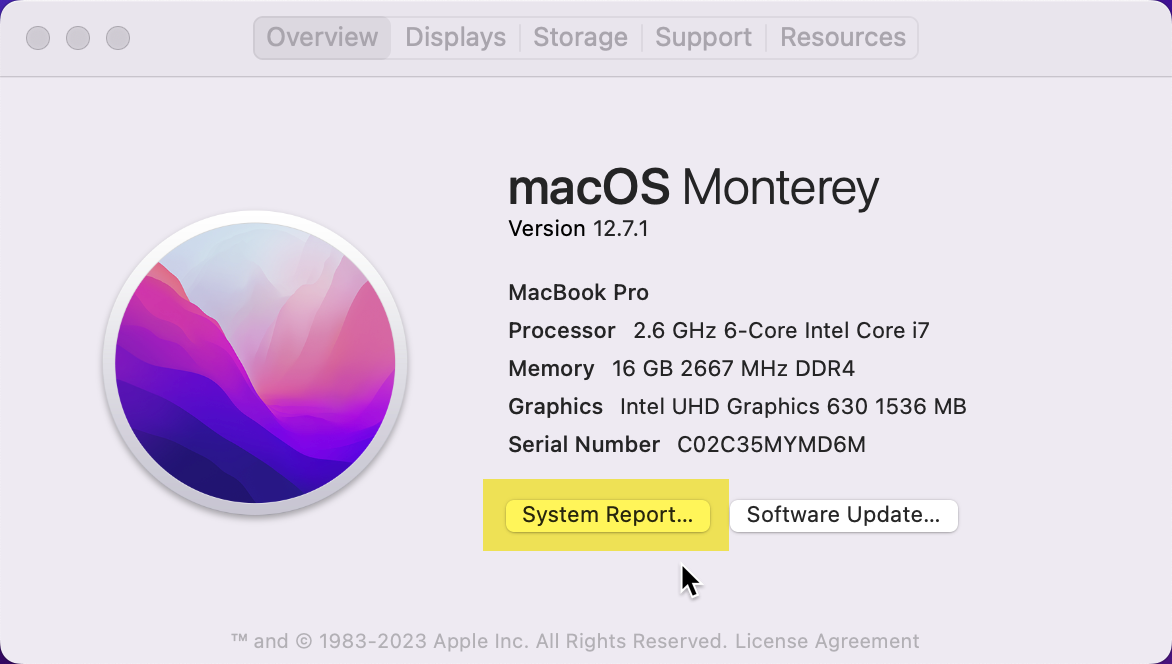
Step 2: Open System Report
- Click System Report in the About window
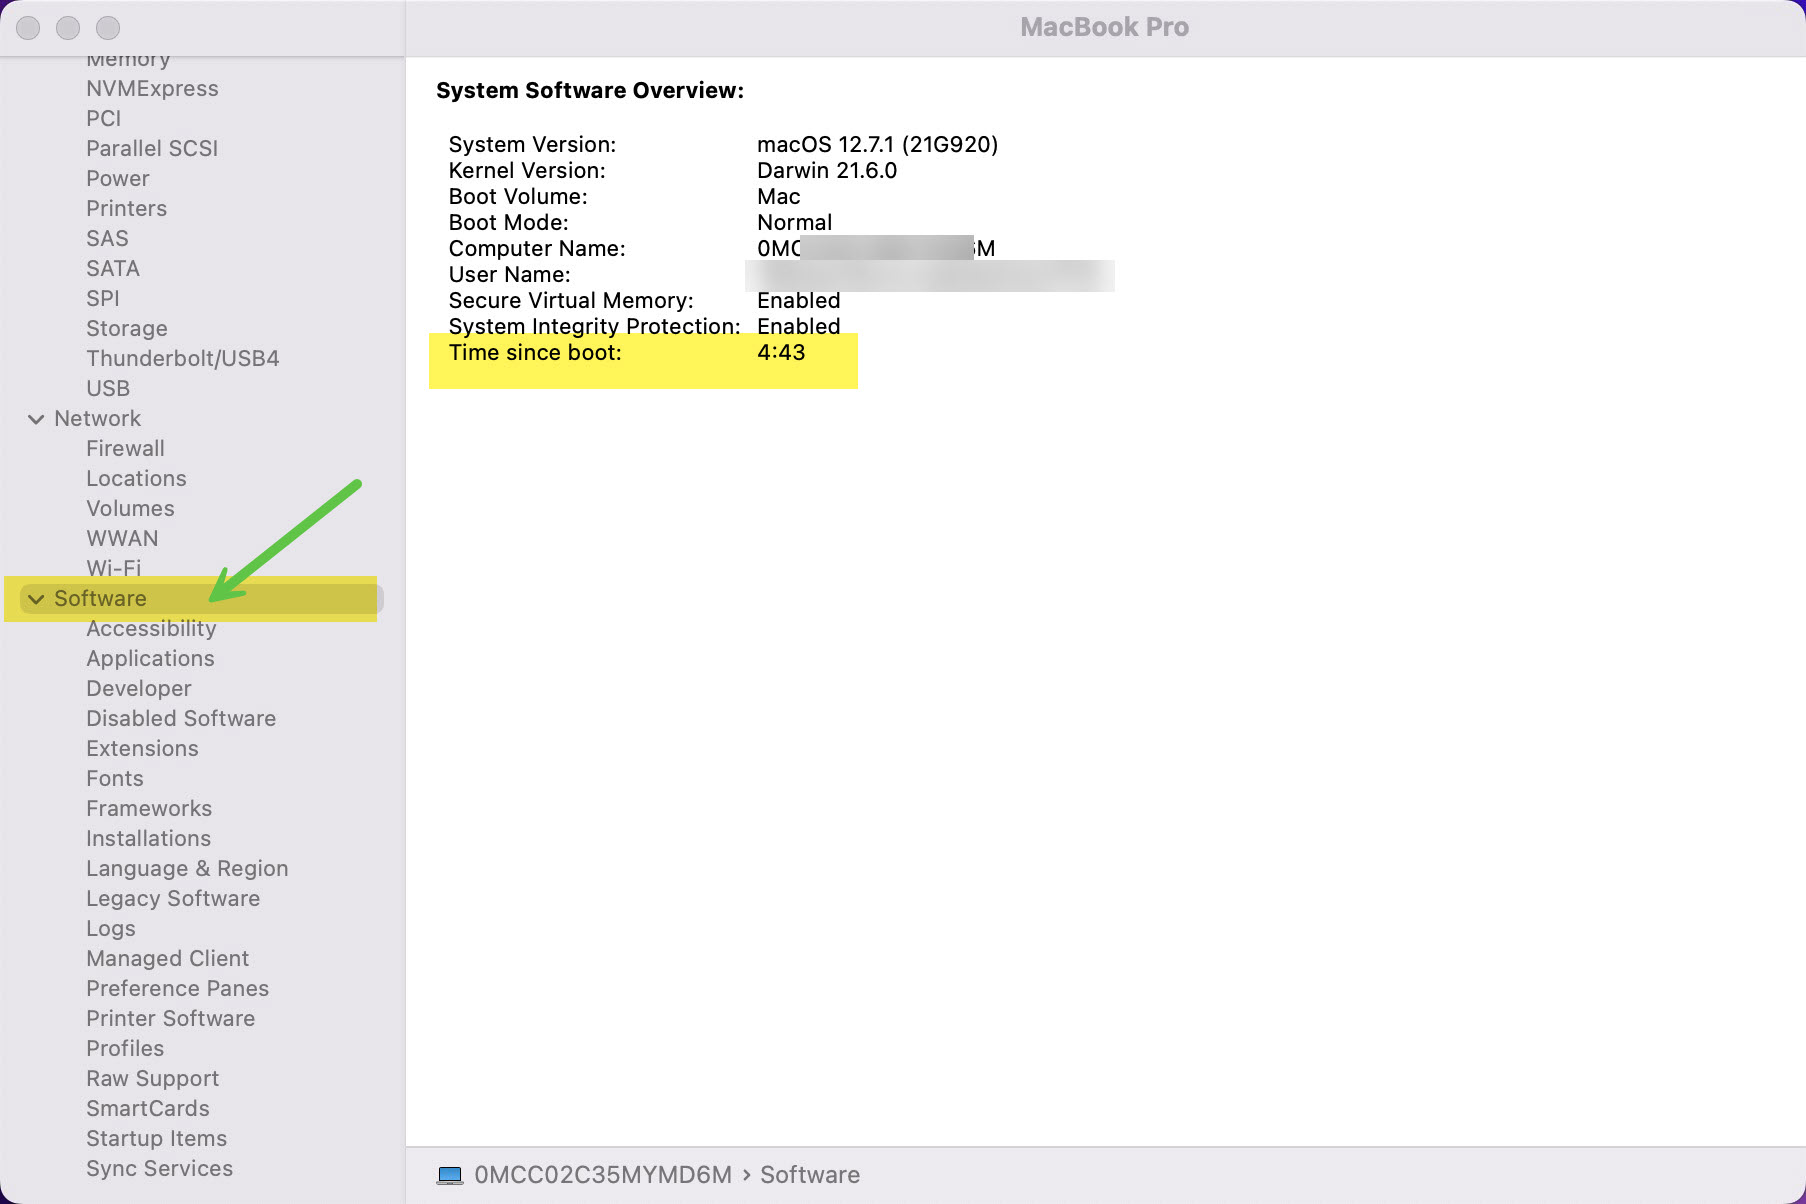
Step 3: Check Time Since Boot
- Select Software from the sidebar
- Look for Time since boot — this is your Mac’s uptime
Other Ways to Check Uptime (Advanced)
- Windows: Open Command Prompt and type
systeminfoto see boot time - macOS: Open Terminal and type
uptimefor a quick view
Why Does Uptime Matter?
Uptime helps IT admins and everyday users decide when a restart may improve performance. Prolonged uptime can cause memory fragmentation, driver conflicts, or postponed updates. Overheating computers can also benefit from a restart to reset sensors and cooling curves.
Frequently Asked Questions
How often should I restart my computer?
For most users, restarting once a week is a good practice. It clears temporary files and ensures updates are applied.
Is high uptime bad?
Not necessarily, but very high uptime (weeks/months) can affect performance. Restarting helps reclaim system resources.
Can I schedule automatic restarts?
Yes. Both Windows and macOS allow scheduled restarts via Task Scheduler and Energy Saver settings, respectively.
Related Articles from MagnetClicks
- How to Monitor Computer Overheating
- How to Speed Up Your Computer
- Fix a Frozen or Unresponsive Computer
Author: Waheed Burna with 15+ years of experience in endpoint administration, systems monitoring, and infrastructure performance.