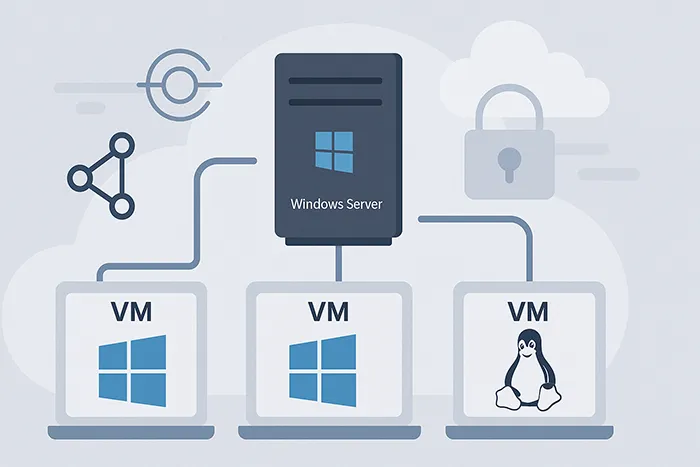
Hyper-V, Microsoft’s hardware virtualization product, enables users to create and run software versions of computers called virtual machines (VMs). Each VM acts as a full-fledged computer, capable of running its own operating system and applications independently.
This capability is invaluable for IT professionals, developers, and businesses needing to test applications, manage server resources, or consolidate hardware. Hyper-V offers a scalable and flexible platform for modern IT infrastructure, helping organizations meet today’s dynamic digital demands with ease.
Why Use Hyper-V?
- Centralized Management: Control all VMs from one console.
- Improved Security: Isolated environments for testing apps safely.
- Cross-Platform Support: Run Windows and Linux distributions.
- Scalability: From a single laptop to enterprise clusters.
- Compliance: Supports PCI-DSS, ISO 27001, SOC2, and GDPR audits.
Getting Started with Hyper-V
Before you begin creating VMs, make sure Hyper-V is enabled on your system. Hyper-V is available on:
- Windows 10 Pro, Enterprise, or Education
- Windows 11 Pro, Enterprise, or Education
- Windows Server editions
To enable Hyper-V:
- Click the Start Menu and type Turn Windows Features On or Off, then press Enter.
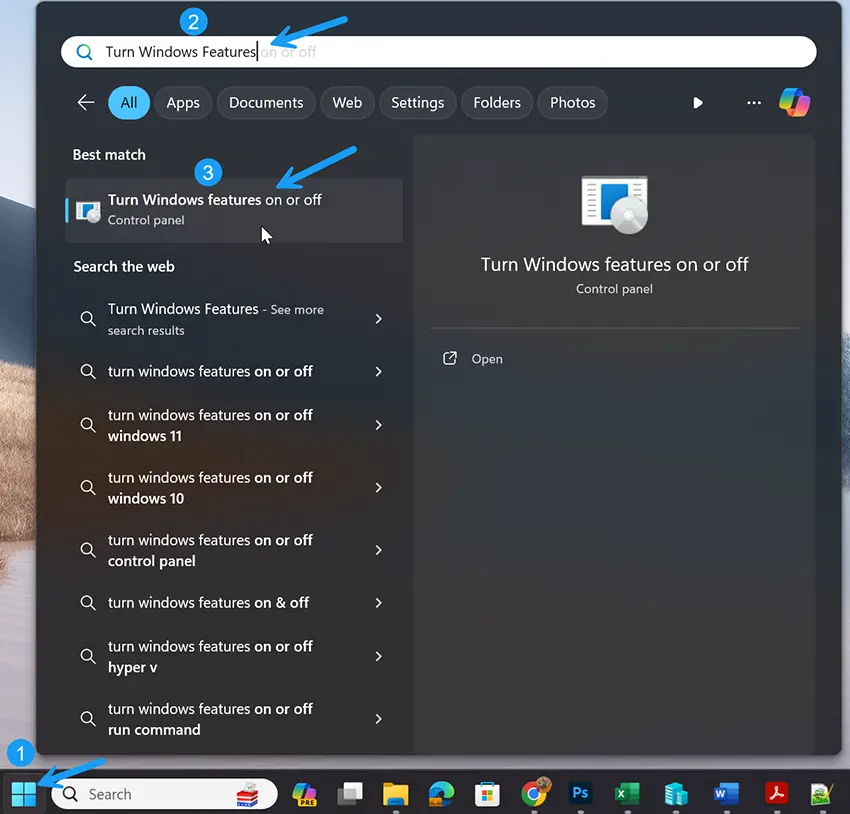
Accessing Windows features to enable Hyper-V. - Scroll down and find Hyper-V.
- Check the box next to Hyper-V and click OK.
- Windows will install the required components and prompt a reboot.
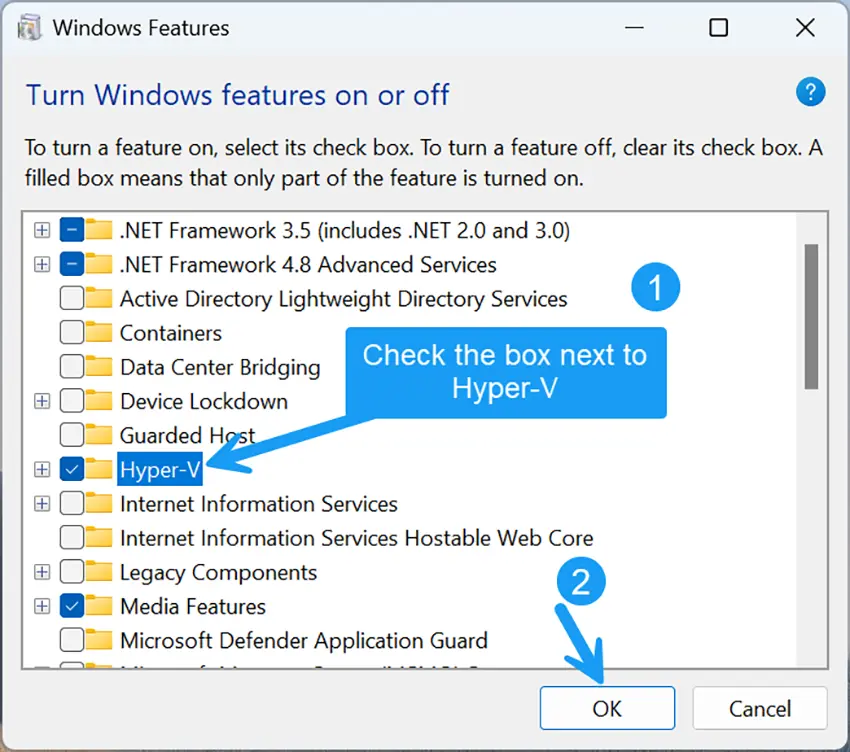
Enabling Hyper-V from the Windows Features menu.
Step 1: Launch Hyper-V Manager
- Open the Start Menu, search for Hyper-V Manager, and launch it.
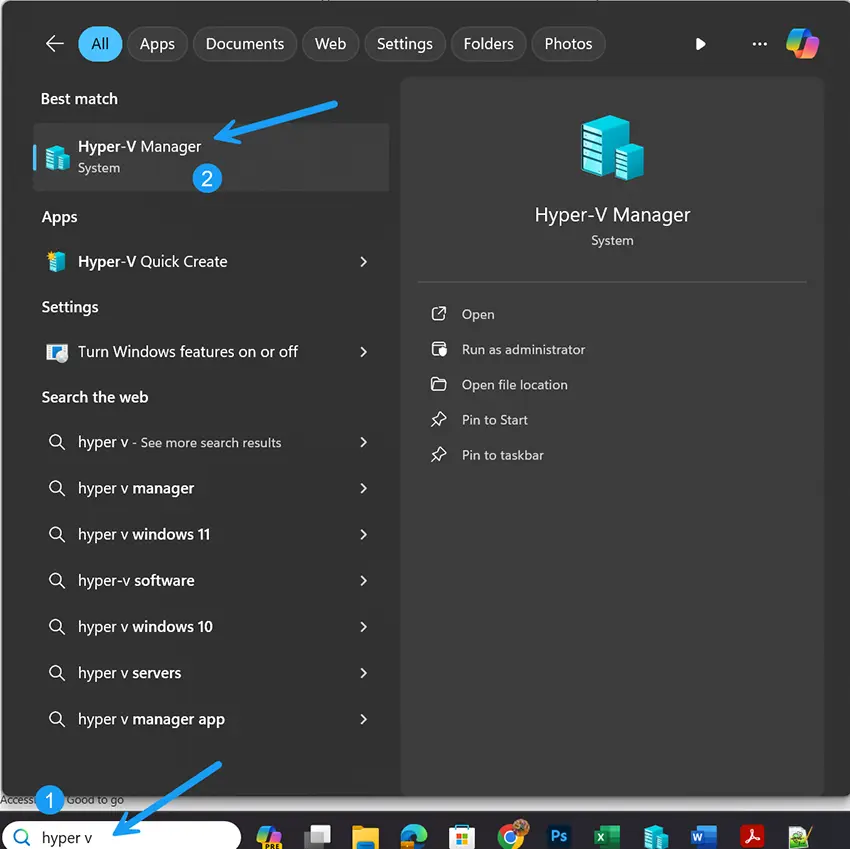
Launching Hyper-V Manager from the Start Menu.
Step 2: Configure Your Virtual Network
To allow communication between VMs and the internet, create a virtual switch:
- In Hyper-V Manager, click on Virtual Switch Manager in the right pane.
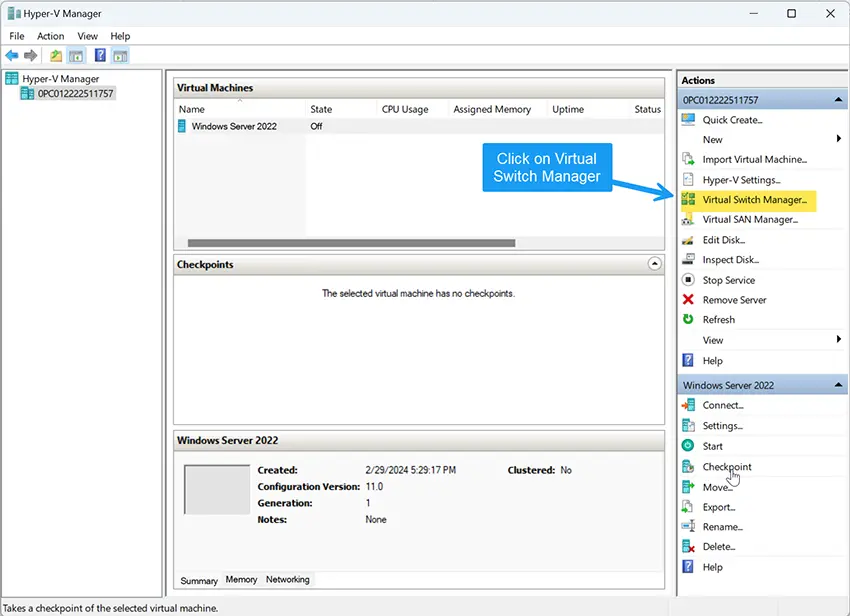
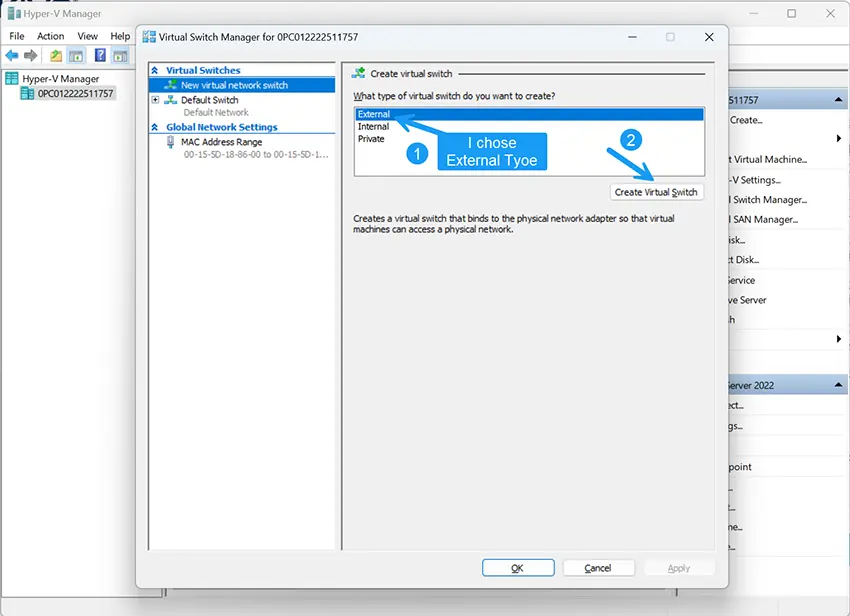
Hyper-V Virtual Switch Manager allows you to configure VM networking. - Select New virtual network switch and choose the type:
- External: Connects VMs to a physical network and internet.
- Internal: Communication between VMs and host only, no internet access.
- Private: Communication only among VMs, fully isolated from host and internet.
- Name your switch, configure the settings, and apply.
Creating an external virtual switch for internet connectivity. 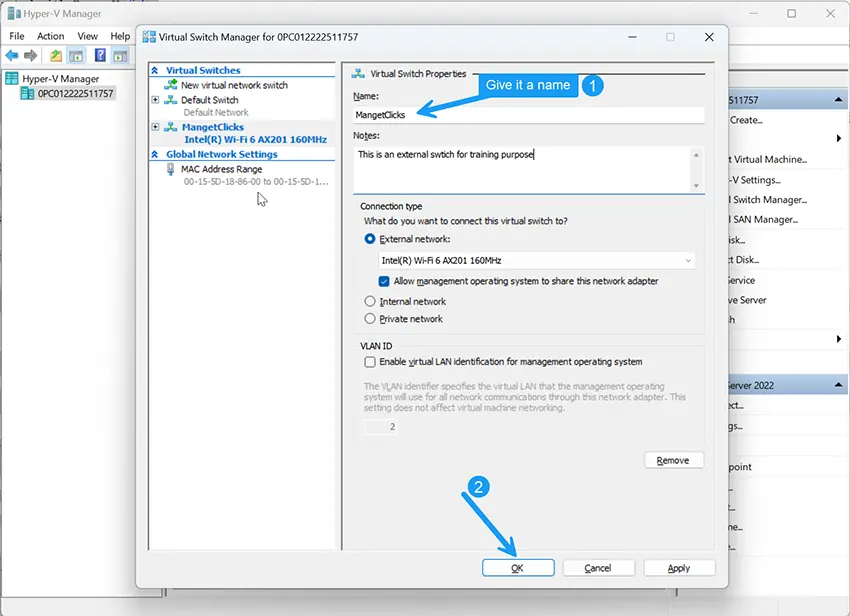
Finalizing virtual switch configuration.
Step 3: Create the First Virtual Machine
- In Hyper-V Manager, right-click on your computer name and select New → Virtual Machine.
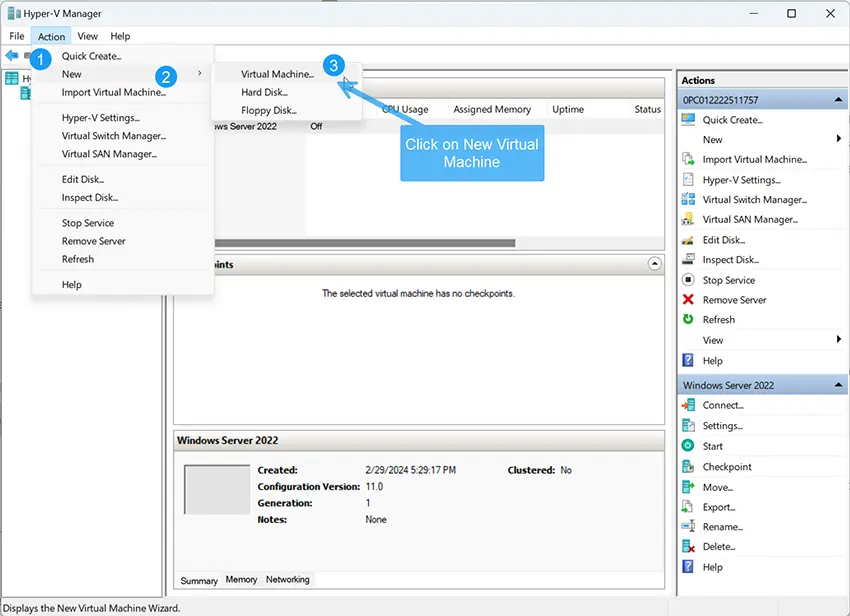
Starting the new virtual machine wizard. - Launch the New Virtual Machine Wizard and click Next.
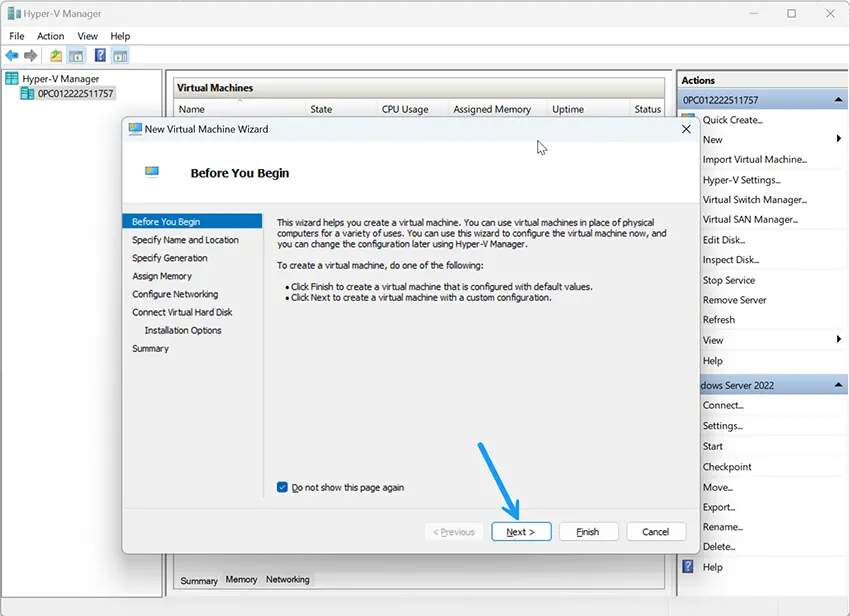
Using the New Virtual Machine Wizard in Hyper-V. - Name your VM and choose the storage location.

Naming and setting storage location for the VM. - Select the generation:
- Generation 1: Legacy BIOS-based VM.
- Generation 2: UEFI-based VM with newer features (recommended if supported).
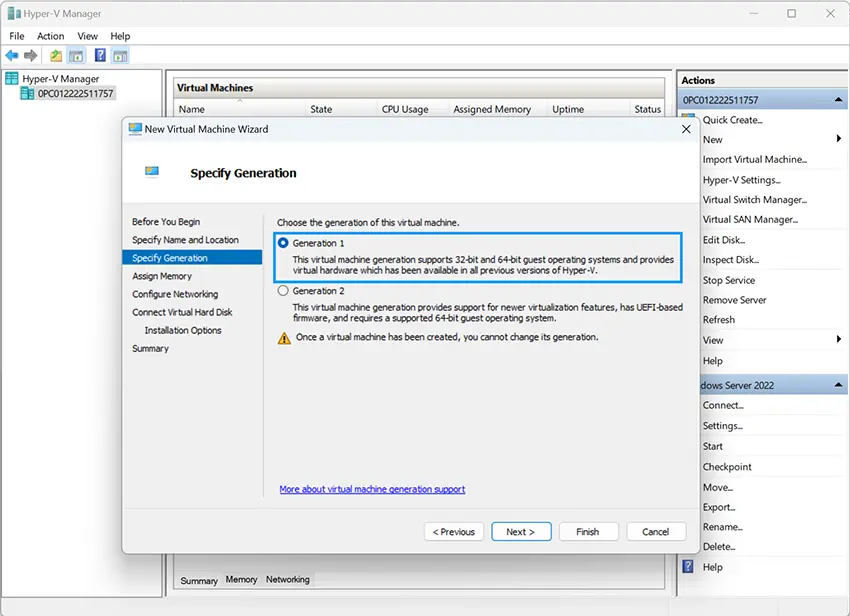
Choosing between Generation 1 and Generation 2 VMs.
- Assign memory, enabling Dynamic Memory if desired.
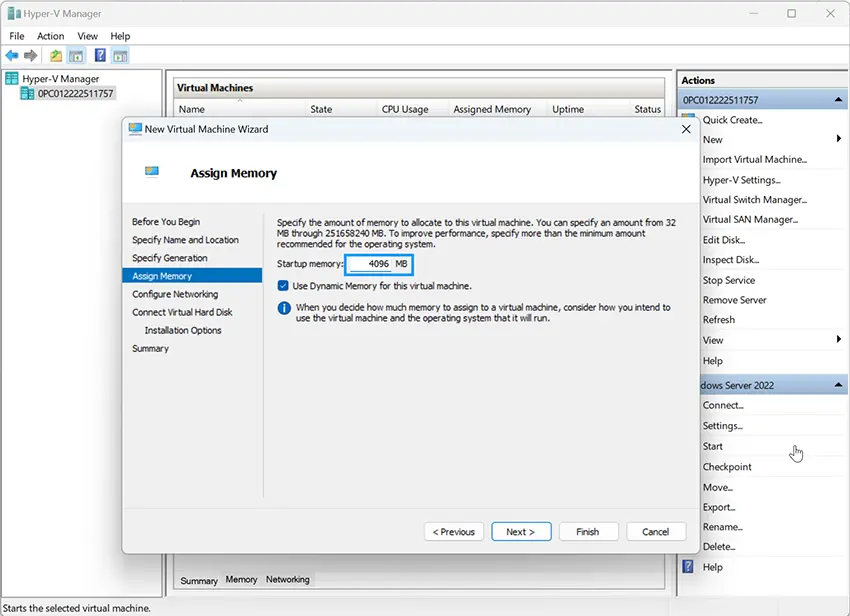
Allocating memory to the new virtual machine. - Connect your VM to the virtual switch created earlier.
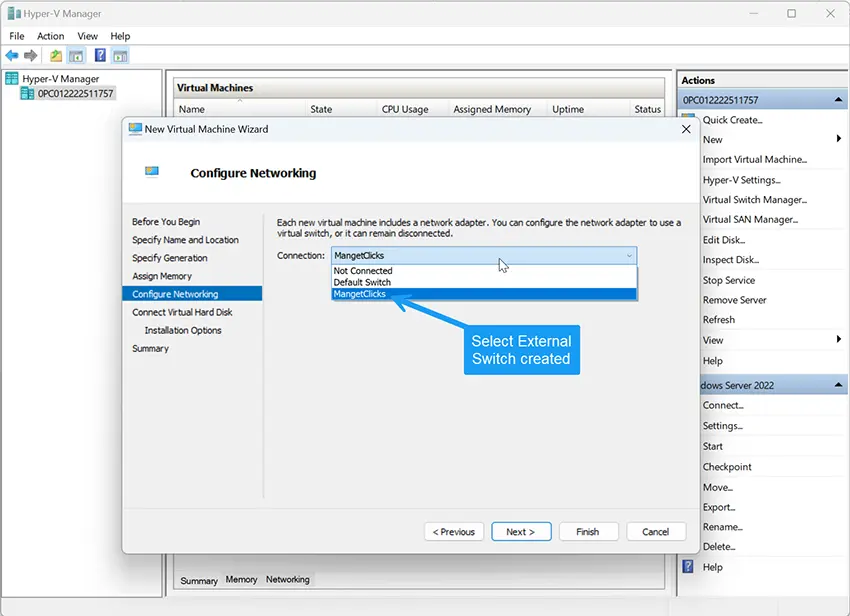
Attaching the VM to a virtual switch for networking. - Create a virtual hard disk, specifying size and location.
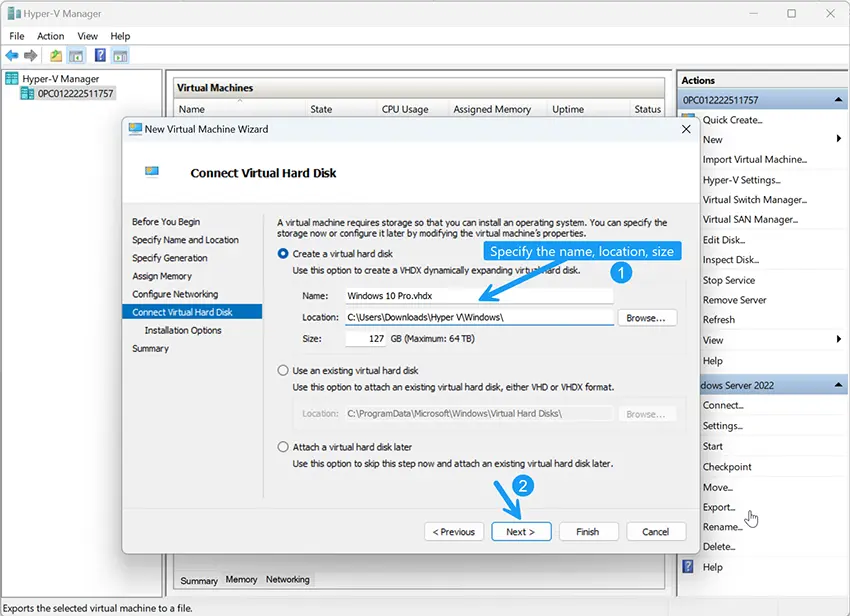
Creating and configuring a new virtual hard disk. - Choose installation media — ISO file or bootable CD/DVD.
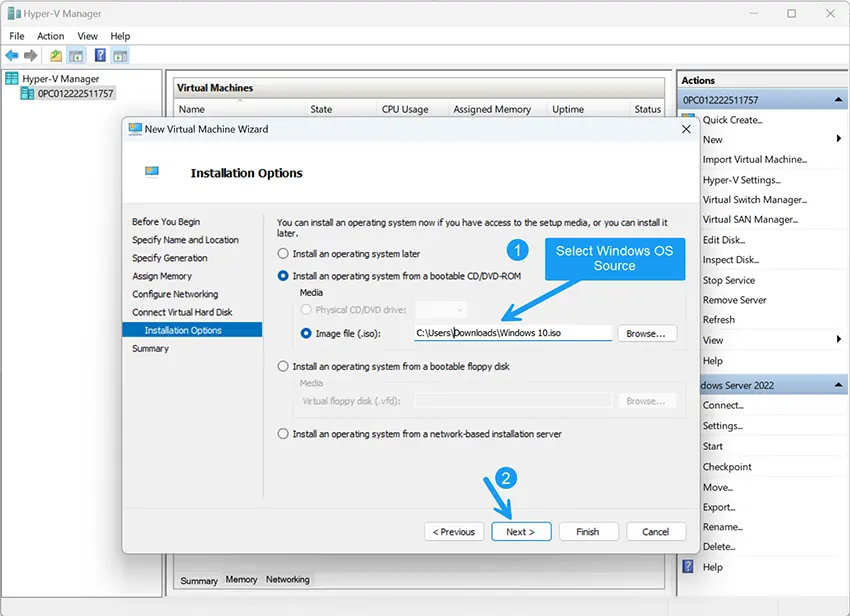
Choosing OS installation source for the VM. - Review your settings and click Finish.

Completing the virtual machine creation wizard.
Step 4: Duplicate Virtual Machines
To create multiple VMs without repeating the entire setup:
- Locate the original VM’s VHD or VHDX file.
- Copy and rename the VHD/VHDX file.
- Use Hyper-V Manager to create a new VM, selecting Use an existing virtual hard disk and pointing to your copied file.
Step 5: Automating VM Creation with PowerShell
PowerShell is a powerful way to automate VM creation. Example:
New-VM -Name "VMName" -MemoryStartupBytes 2GB -NewVHDPath "C:\VMs\VMName.vhdx" -NewVHDSizeBytes 40GB -SwitchName "YourVirtualSwitch"Modify the script to batch-create multiple VMs efficiently, saving setup time and ensuring consistency.
Best Practices for Managing Multiple VMs
- Use a Consistent Naming Convention: Eases management and identification.
- Monitor Resource Allocation: Adjust memory and CPU as needed to avoid resource contention.
- Implement Regular Backups: Protect VMs and critical data by backing up virtual disks.
📖 Related Articles
🌐 External References
Frequently Asked Questions
Is Hyper-V free?
Yes, Hyper-V is included at no extra cost with Windows 10/11 Pro, Enterprise editions, and all Windows Server editions.
What is the difference between Generation 1 and Generation 2 VMs?
Generation 2 VMs support UEFI firmware, Secure Boot, and modern hardware features, whereas Generation 1 uses BIOS emulation.
Can Hyper-V run Linux virtual machines?
Yes, Hyper-V supports various Linux distributions, including Ubuntu, CentOS, Red Hat, and more.
Can I use Hyper-V on Windows 10 Home?
No, Hyper-V is not available on Windows 10 Home edition. Upgrade to Windows 10 Pro or higher to use Hyper-V.
How many VMs can I run on Hyper-V?
The number depends on your system resources (RAM, CPU, storage). Hyper-V scales to support dozens or even hundreds of VMs on powerful hardware.