Is your Windows 10 computer running sluggishly? Are you constantly receiving “Low Disk Space” warnings? Over time, files, apps, and system data build up and can reduce both performance and storage. The good news is that Windows 10 provides several built-in tools and settings to help you free up valuable space without compromising important files. In this detailed guide, we’ll cover proven methods for cleaning up your PC and keeping it optimized.
💡 Why Disk Cleanup Matters
Windows 10 is powerful, but like any operating system, it gathers clutter over time. From temporary files to outdated Windows Update data, unused programs, and cache, these can pile up and slow performance. Cleaning up your disk space helps you:
- Improve system performance and boot times.
- Free up storage for important files, apps, and updates.
- Reduce the risk of crashes caused by low storage.
- Extend the life of your hard drive.
⚠️ Warning: Always back up important files before performing deep system cleanup. This ensures you don’t accidentally lose valuable data.
🛠️ Steps to Clean Up Disk Space on Windows 10
1. Use the Legacy Disk Cleanup Tool
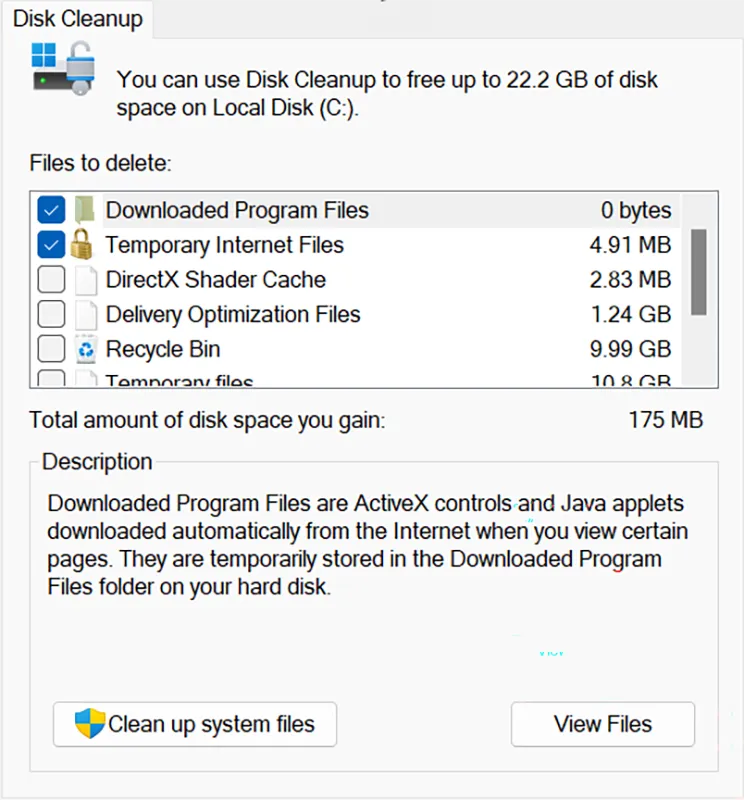
- Press the Windows key and type Disk Cleanup, then press Enter.
- Select your drive (usually C:).
- The tool will scan for unnecessary files like temp data, recycle bin, and system logs.
- Check the boxes next to the file types you want to delete.
- Click OK → Delete Files.
💡 Pro Tip: For more options, click Clean up system files. This lets you delete outdated Windows Update files and even old system installations.
Related: How to Use Disk Cleanup to Delete Temporary Files.
2. Clear System Files
- Reopen the Disk Cleanup tool.
- Select your system drive.
- Click Clean up system files.
- After scanning, check boxes like Windows Update Cleanup or Previous Windows Installation.
- Click OK → Delete Files.
⚠️ Warning: Deleting Previous Windows Installation means you cannot roll back to an earlier version of Windows. Only do this if you’re sure you won’t downgrade.
3. Manage Installed Programs
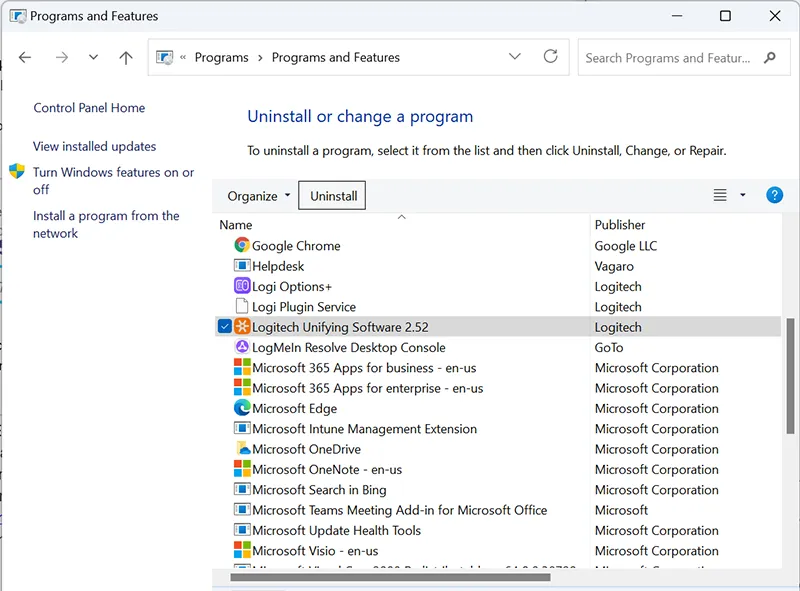
- Open the Control Panel.
- Go to Programs > Programs and Features.
- Sort programs by Size or Install Date.
- Right-click on unused apps → Uninstall.
Related: How to Uninstall Windows Store Apps.
4. Use Storage Sense
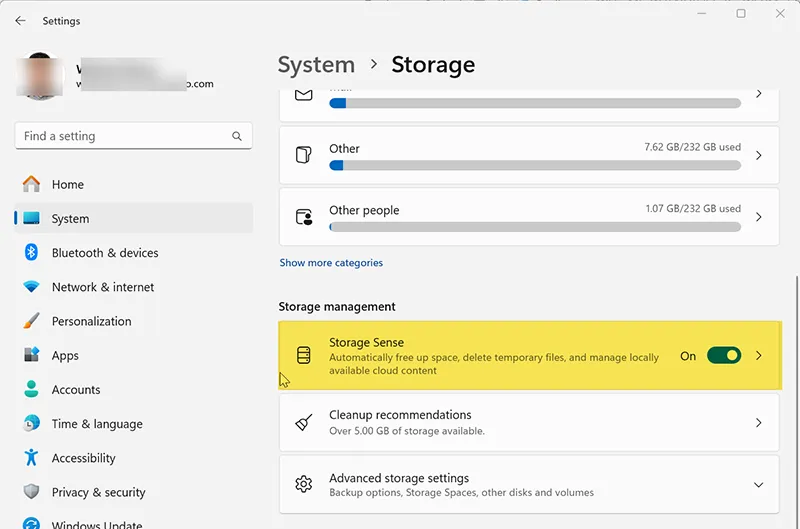
- Open Settings > System > Storage.
- Toggle Storage Sense to ON.
- Click Configure Storage Sense or run it now to customize cleanup frequency.
Learn more from Microsoft Docs – Free Up Drive Space in Windows 10.
5. Optimize OneDrive Usage
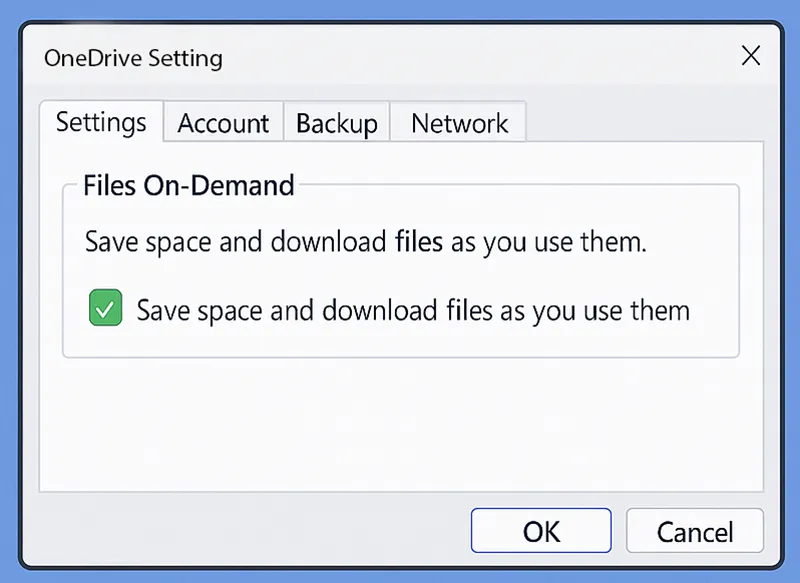
OneDrive offers a Files On-Demand feature that saves space by keeping files online until you need them.
- Right-click the OneDrive icon in the system tray.
- Click Settings > Files On-Demand.
- Check Save space and download files as you use them.
6. Empty the Recycle Bin
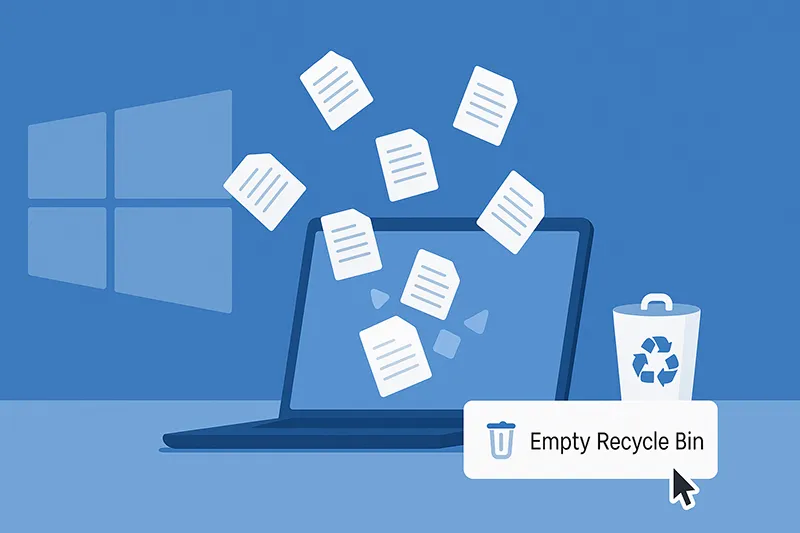
When you delete files, they aren’t gone until you empty the Recycle Bin.
- Right-click the Recycle Bin icon on your desktop.
- Select Empty Recycle Bin.
💡 Pro Tip: Configure Storage Sense to empty the Recycle Bin automatically every 30 days.
7. Delete Temporary Files Manually
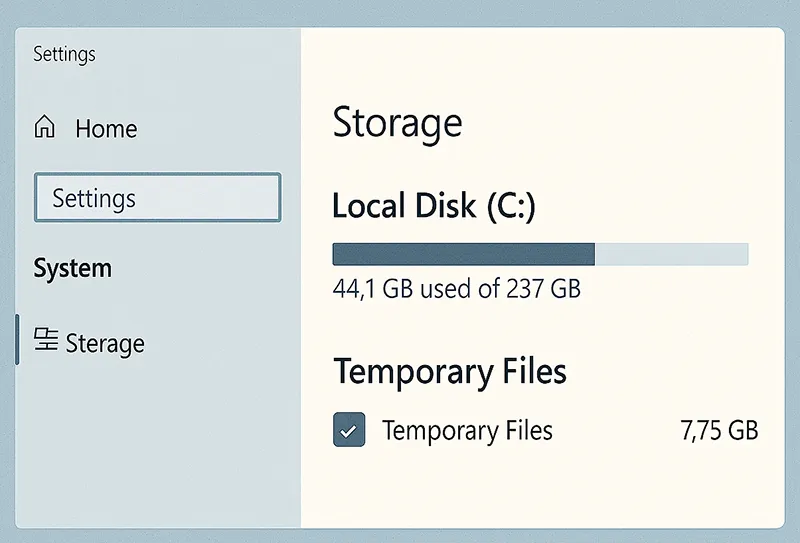
- Go to Settings > System > Storage.
- Click Temporary files.
- Select categories like Downloads, Delivery Optimization Files, and Thumbnails.
- Click Remove files.
📊 Benefits of Regular Disk Cleanup
- Speeds up your PC and reduces boot time.
- Ensures Windows updates install smoothly.
- Prevents low-storage errors that cause apps to crash.
- Helps extend the lifespan of your hard drive or SSD.
📌 Related Articles
- How to Clean Up Disk Space on Windows 11
- How to Use Disk Cleanup to Delete Temporary Files
- How to Speed Up Your Computer with Windows OS
Frequently Asked Questions
What is the best tool to clean disk space in Windows 10?
The built-in Disk Cleanup Utility and Storage Sense are reliable for most users. Third-party apps are optional but not necessary.
How often should I clean my disk space?
A monthly cleanup is recommended. If you install large apps or handle media files frequently, consider bi-weekly cleanups.
Will deleting system files cause issues?
No, Windows only lists safe-to-delete files. However, be cautious when removing old installations (Windows.old) as rollback won’t be possible.
Does Storage Sense run automatically?
Yes. Once enabled, Storage Sense runs based on the schedule you configure — daily, weekly, or monthly.
Is it safe to delete Temporary Files?
Yes. Deleting temporary files is safe and can recover gigabytes of space without affecting personal documents.