Windows 11 introduces a modern design and powerful features, but even advanced systems accumulate clutter over time. Temporary files, app data, old updates, and downloads can consume storage, slow performance, and trigger low disk warnings. The good news? Windows 11 includes several built-in cleanup options that make it easy to reclaim valuable space. In this guide, we’ll cover step-by-step cleanup methods, advanced tips, and preventive practices to keep your PC running smoothly.
⚡ Why Disk Cleanup Is Important
Over time, your computer accumulates gigabytes of unnecessary files: logs, cache, system updates, and apps you no longer use. Cleaning up disk space helps you:
- Improve speed and responsiveness.
- Ensure Windows Updates install without errors.
- Prevent crashes caused by low storage space.
- Free room for documents, photos, games, and applications.
⚠️ Warning: Always back up important data before deep cleanup to avoid accidental file loss. Use Windows Backup & Restore or cloud storage like OneDrive.
🛠️ Steps to Clean Up Disk Space on Windows 11
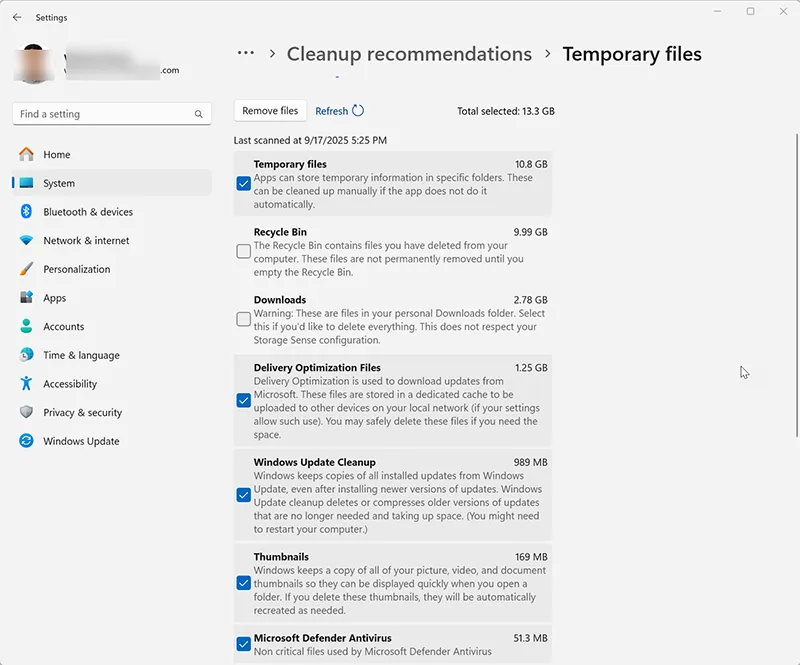
1. Using the New Settings Menu
Windows 11 redesigned the Settings > Storage menu, making cleanup easier.
- Press Windows + I to open Settings.
- Go to System > Storage.
- Click Cleanup recommendations (or Free up space now).
- Windows will scan for categories like Temporary files, Recycle Bin, Thumbnails.
- Check boxes and click Remove files.
💡 Pro Tip: Run cleanup before installing large updates to prevent “Not Enough Disk Space” errors. For reference, see Microsoft Docs – Free Up Space.
2. Managing Installed Apps
Unused apps can take up gigabytes of storage. Windows 11 makes it easy to identify large programs.
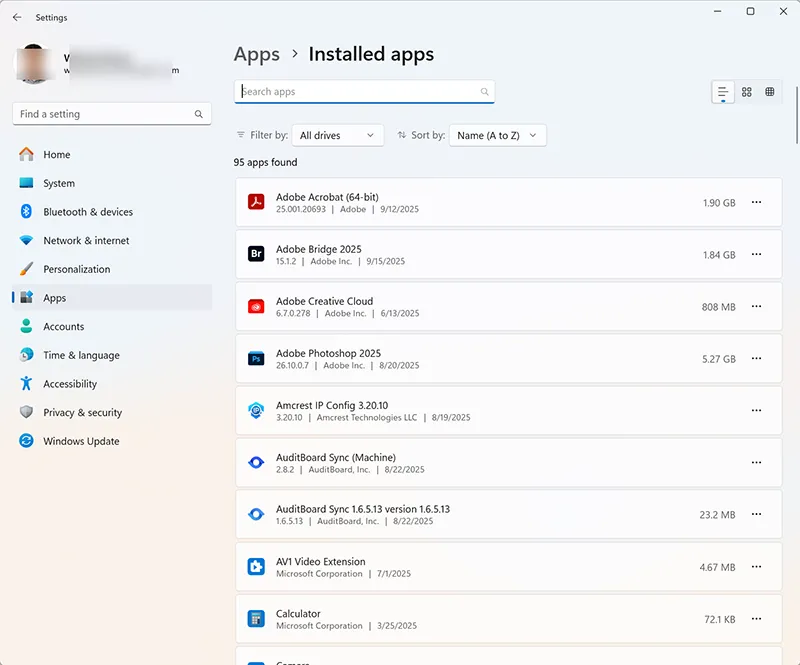
- Go to Settings > Apps > Installed Apps.
- Sort apps by Size to see storage usage.
- Select unused apps and click Uninstall.
Related: How to Uninstall Windows Store Apps.
3. Remove Temporary Files
Temporary files accumulate from updates, apps, and system logs.
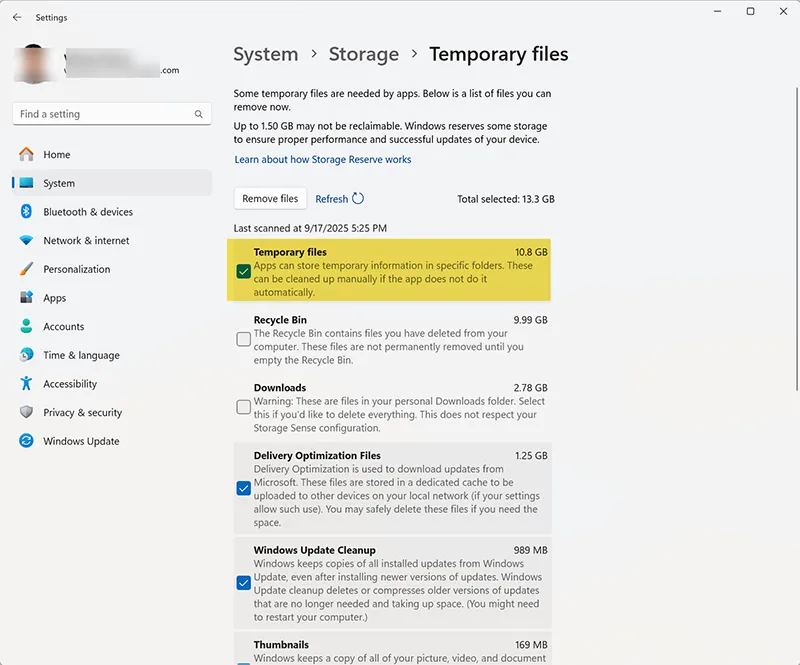
- Press Windows + R → type
cleanmgr. - Select your drive (C:).
- Check Temporary Files, Recycle Bin, Thumbnails.
- Click OK → Delete Files.
⚠️ Warning: Be careful with Downloads selection — anything inside will be permanently deleted.
4. Automate Cleanup with Storage Sense
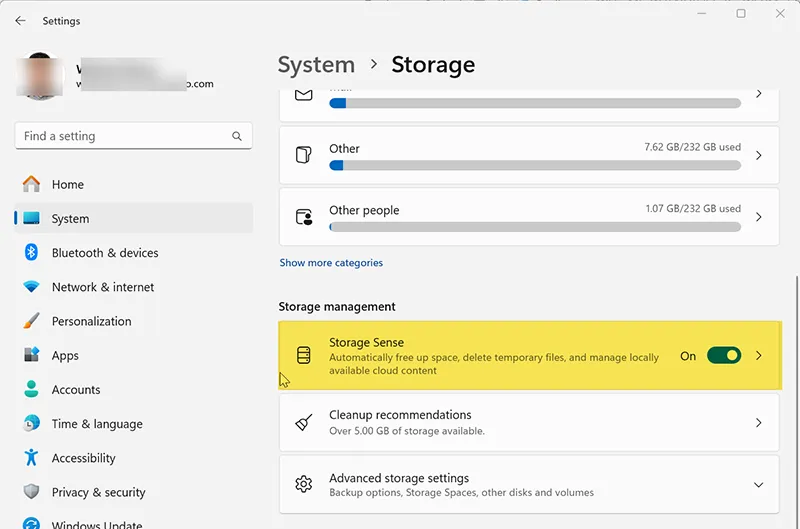
- Go to Settings > System > Storage.
- Click Storage Sense.
- Toggle ON to enable automatic cleanup.
- Configure frequency (daily, weekly, monthly).
💡 Pro Tip: Storage Sense can automatically clear the Recycle Bin every 30 days. Set it up once and forget it.
📊 Additional Tips for Maximizing Disk Space
Clear Downloads Folder
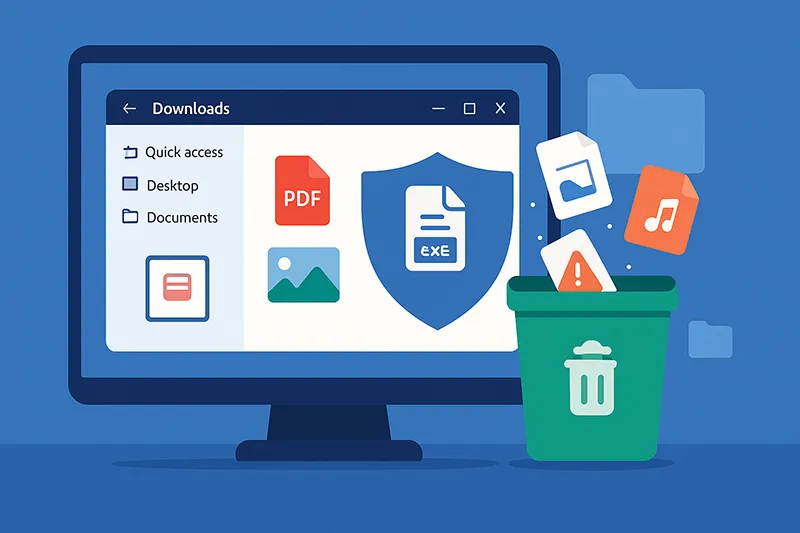
The Downloads folder is often the biggest storage hog. Delete installers, old PDFs, and duplicate files.
Manage OneDrive Files
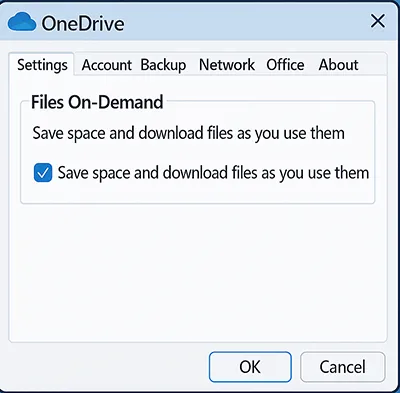
Enable Files On-Demand to keep files in the cloud while freeing local disk space.
- Right-click OneDrive → Settings.
- Check Save space and download files as you use them.
Move Files to External Drives
Large videos, photos, or game libraries? Move them to an external HDD/SSD or USB drive.
Disable Hibernation
Hibernation creates a file (hiberfil.sys) that can consume several GBs. If you never use it, disable it.
powercfg.exe /hibernate off
⚠️ Warning: Disabling hibernation removes Fast Startup functionality. Only do this if you don’t rely on hibernate mode.
Regular System Maintenance
Update Windows, drivers, and applications regularly to prevent bloat and security risks. See Microsoft Docs – Windows Update.
📌 Related Articles
- How to Clean Up Computer Disk Space
- How to Use Disk Cleanup to Delete Temporary Files
- How to Delete Temporary Files in Windows 11
- How to Speed Up Your Computer with Windows OS
Frequently Asked Questions
What is Storage Sense in Windows 11?
Storage Sense is a built-in Windows 11 feature that automatically deletes unnecessary files, such as temporary files and recycle bin contents, based on your configured schedule.
Can Disk Cleanup delete important files?
No. Disk Cleanup only targets safe-to-delete files like cache, temp data, and update files. However, always double-check your selections before confirming.
Is it safe to delete system files during cleanup?
Yes, but review carefully. Deleting Windows.old removes rollback options to previous versions, so only remove it if you’re confident you won’t downgrade.
How often should I clean up my Windows 11 PC?
A monthly cleanup is recommended. If you frequently install apps or download large files, consider bi-weekly cleanups.
Does cleaning up disk space improve PC performance?
Yes. Freeing up disk space improves responsiveness, speeds up boot time, and ensures updates install smoothly without errors.