Creating a project in Asana is a simple yet powerful way to organize your work, assign tasks, and track progress across teams. Whether you’re planning a marketing campaign or managing daily operations, Asana provides the flexibility to match your workflow. Here’s how to create a project step-by-step.
🚀 Steps to Create a Project in Asana
- Log In to Asana: Head to asana.com and sign in with your account.
- Access Workspace or Team: From the sidebar, select the team or workspace where the new project should reside.
- Click the ‘Create’ Button: Locate and click the Create button on the top-left corner.
- Select Project: Choose Project from the dropdown.
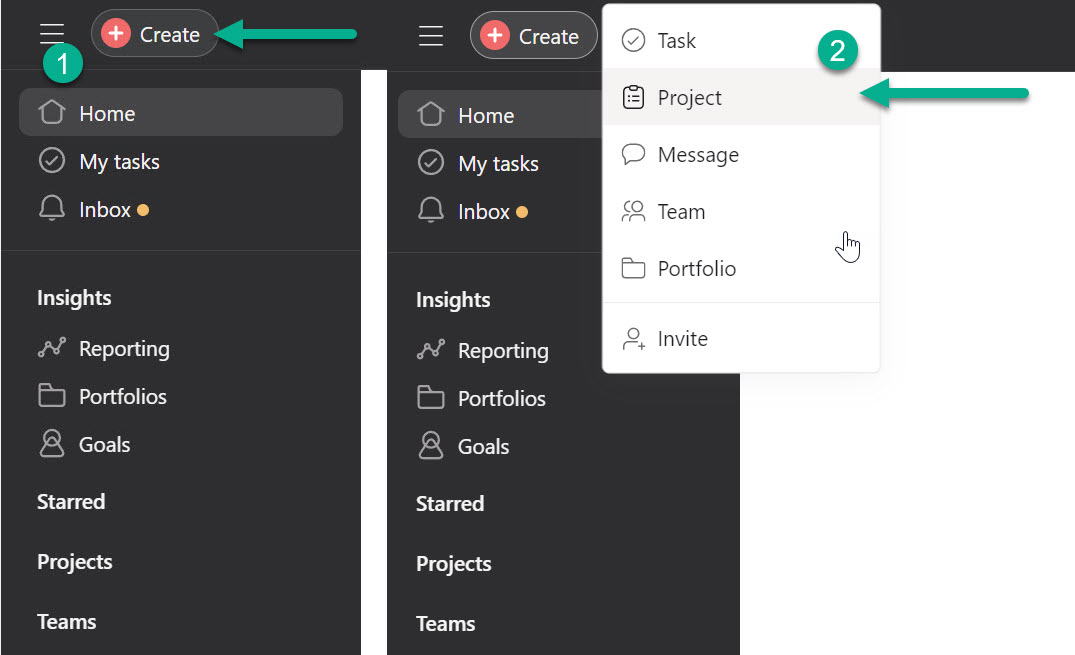
Click on ‘Create’ and select ‘Project’ in Asana - Choose Template or Start Blank: Pick from existing templates or select Blank Project.
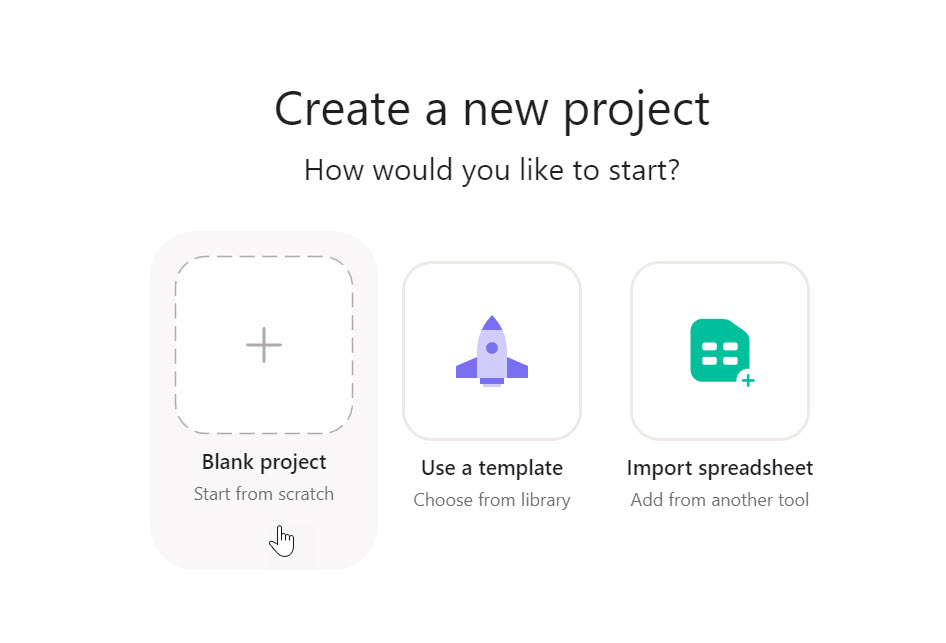
Select a built-in template or start from scratch - Name Your Project: Choose a project title that reflects its purpose clearly.
- Add Details: Fill in description, due date, collaborators, and color tags for quick identification.
- Set Privacy Settings: Choose whether to make it public to your team or private to specific members.
- Click Create Project: After entering the details, click Create Project.

Finalize setup with ‘Create Project’ - Add Sections & Tasks: Organize your project with sections and assign tasks accordingly.
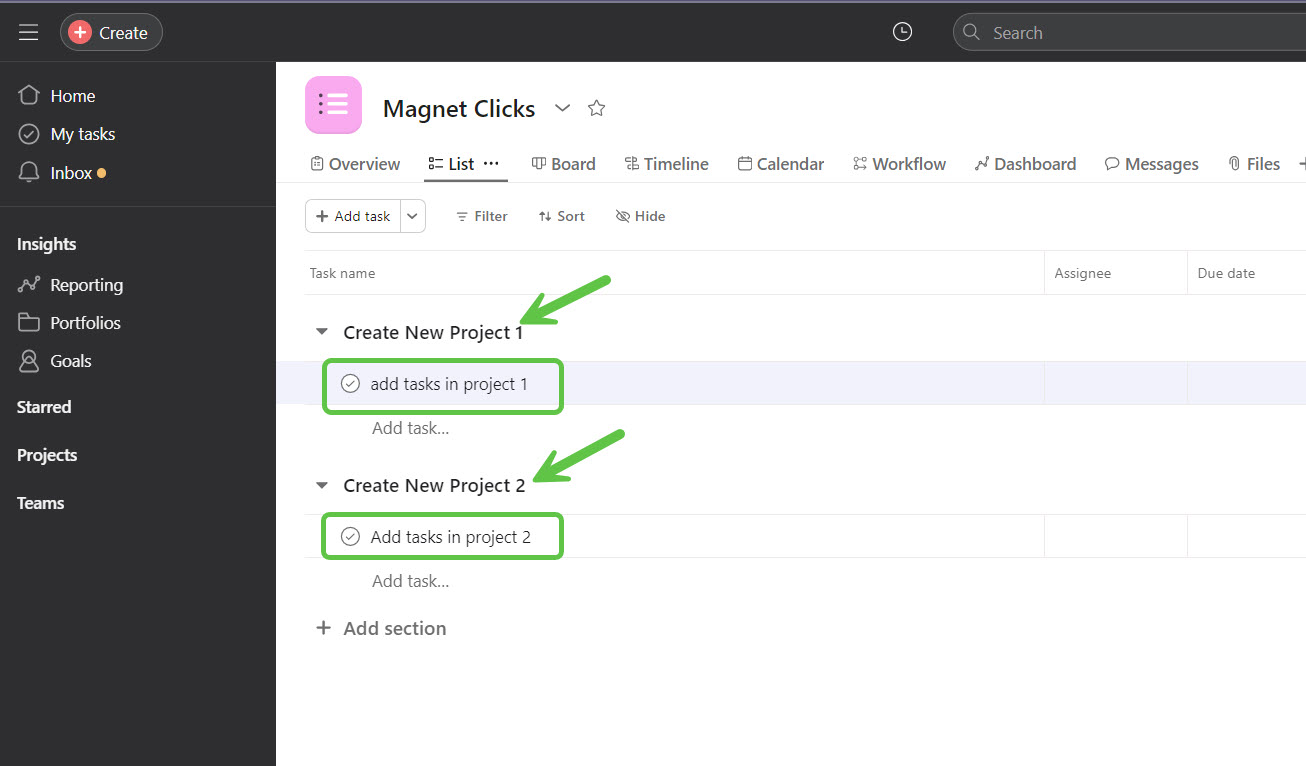
Structure your project into phases using sections
📌 Best Practices for Asana Projects
- Use task dependencies to manage workflow logic.
- Add due dates and assign priorities for clarity.
- Use calendar or timeline view to visualize milestones.
- Leave comments within tasks to keep communication centralized.
- Leverage guest user invitations to collaborate with external stakeholders.
📚 Related Guides
- How to Invite Guest/External Users to Asana
- Create a macOS Bootable USB
- Run Active Directory Users and Computers
Frequently Asked Questions
Can I use templates when creating an Asana project?
Yes, Asana offers several pre-built templates, or you can start fresh with a blank project.
Can I invite team members to a project?
Yes. You can invite teammates and assign tasks during or after project creation.
Is there a limit to how many projects I can create?
No hard limit exists in the free version, but premium features may be limited based on your plan.
Can I change privacy settings later?
Yes, you can make a project public or private even after it’s created.
Does Asana offer visual progress tracking?
Yes. You can view projects in list, board, calendar, or timeline view.